Dried apples in the oven - preserving the taste of summer forever. Cooking dried apples in the oven with cinnamon, cardamom, cherry branches
One of the most reasonable and convenient ways to preserve the apple harvest and prepare them for the winter is drying. It can be done in the sun on warm summer days. But it’s easy to dry apples in an oven – gas or electric. This drying method is ideal in an urban environment.
Without a doubt, dried fruits will be a great addition to the menu. Sweet compotes and other dishes made from dried apples will delight you with their bright taste and aroma. Dried fruits are useful in preparing salads, sauces, and baking pies. They make an excellent topping for pancakes and pancakes, an addition to soup and even jam.
Dishes made from dried apples will displace autumn boredom and fill the winter cold with pleasant summer memories.
Dried fruits are easy to store; they take up minimal space. The labor costs for preparing dried apples are insignificant, especially if you use modern kitchen appliances and appliances.
Dried apples in the oven - general principles of preparation
All varieties of apples, without exception, are suitable for drying. But when there is a large choice, it is better to give preference to fruits with a small seed pod and thin skin. Apples should taste sweet, sour and aromatic.
Before drying, fruits are washed and dried. Wormholes and bruises are removed.
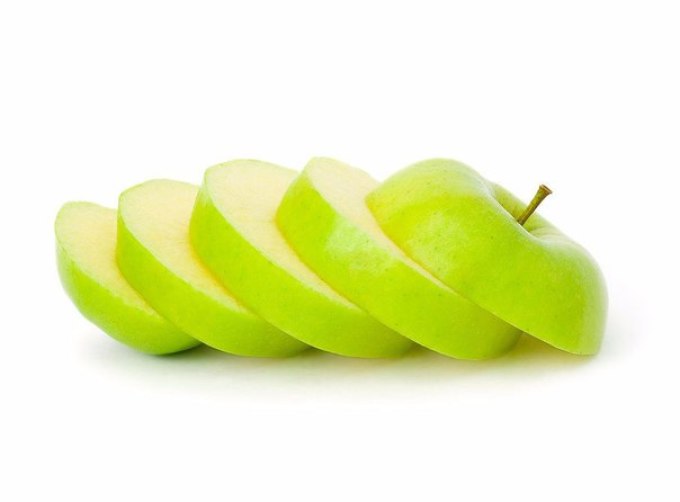
The apples are cut into quarters and the core is cut out. The fruit is cut into slices about half a centimeter thick.
If there is a special device, then with its help the core is removed from a whole apple. Then the fruits are cut into rings of the thickness indicated above.
When dried fruits are prepared exclusively for compote, the core can be left.
Apples are scattered in one layer on a baking sheet. It should be covered with baking paper.
The baking sheet is loaded into the oven for an hour (60 degrees). During this time, the apples will slightly wilt.
Then the temperature increases to 70, and at the very end of drying - to 80-100.
The oven door can be left slightly ajar.
The process takes from 6 to 12 hours. Every 50 minutes the apple pieces are mixed.
To diversify the taste of dried fruits, you can add cinnamon, cardamom, citric acid and regular sugar.
When the apples reach the desired condition, their size will decrease significantly. Cooled dried fruits are placed in fabric or paper bags. Boxes of chocolates will also work.
Dried apples are stored in a dark and cool cabinet, which is periodically ventilated.
Recipe 1. Dried apples in the oven “Dessert”
Ingredients:
Two kg of apples;
One and a half liters of water;
A glass of sugar (more or less is possible, depending on the level of love for sweets).
Cooking method:
Prepare sugar syrup: boil water and add sugar to your taste. We set it aside to cool.
Place the washed fruits in a deep bowl and remove the core and seeds from each fruit. To do this simply, you need to stock up on a special device. With its help you don't have to cut apples.
Cut each fruit into thin rings. We try to keep them approximately the same thickness.
Place the apple slices in a saucepan and fill with cool sugar syrup. It should completely cover the fruit pieces.
Cover the saucepan and take it to a cool place for a day.
The next day, place the apple slices on a paper towel and leave for half an hour to dry.
Line a baking tray with baking paper. Place apple slices on it.
Place in an oven preheated to 60 degrees. A little later, the temperature can be increased to 100. The fruit should be in the oven for six to eight hours.
Turn the slices over periodically.
By evening, the apples turn into dried fruit. We take them out of the oven and put them in bags.
Recipe 2. Dried apples in an electric oven
Ingredients:
Apple fruits – 2.5 kg.
Cooking method:
Let's wash the apples under the tap. Cut it in half and remove the core using a knife.
Cut into slices and place on a baking sheet.
Let's put it in the oven.
Turn on the upper and lower heating modes and the fan. Let's set the temperature to 50 degrees.
We dry the apples for 12 hours. We periodically check their condition.
Store the finished product in an airtight glass jar to prevent moisture from entering.
Recipe 3. Dried apples in the oven “Dry jam”
Ingredients:
One kg of fruit;
0.300 kg sugar;
One tea l. citric acid;
One tsp. cinnamon.
Cooking method:
We clean the fruits from seeds and cut them into large slices.
Place on a baking sheet vertically, skin side up. The slices should fit snugly together.
In a deep plate, mix the sweet ingredient, citric acid and cinnamon.
Sprinkle the resulting mixture over the apple slices.
Place in the oven for three hours (70 degrees).
We take out the apples and place them on parchment, cover with gauze. Leave for 48 hours at room temperature.
We hide the finished dried apples in candy boxes.
Recipe 4. Dried apples in the oven with cherry smoke
Ingredients:
Two kg of apples;
A small armful of cherry branches (without leaves).
Cooking method:
We remove the core from the fruit and cut it into thin slices.
Place apple slices on a baking sheet.
Place the cherry branches on another baking sheet and place it on the bottom of the oven.
Place the apple slices on the top shelf.
We set 50 degrees on the electric oven panel. We start the upper and lower heating modes. We also turn on the fan. He fans the smoke that comes from the heating cherry branches.
After six hours, place the dried apples, soaked in the aroma of berries, on the table surface. We hide them after they cool down.
Recipe 5. Dried apples in the oven with cinnamon and cloves
Ingredients:
A kilogram of sour apples;
Two tablespoons each of ground cloves and cinnamon.
Four tablespoons of sugar.
Cooking method:
Cut whole apples into thin slices. We do not remove the core and seeds.
Place the slices on a baking sheet so that there is a small distance between them.
Mix cloves, cinnamon and sugar in a separate bowl. Sprinkle over apple slices.
Place in the oven for ten minutes (180 degrees).
Turn over, reduce the temperature to 100 and cook for another seven minutes.
Turn off the oven. We don't take out the apples.
When the oven has cooled down, preheat it to 100 degrees, leave it for 10 minutes and turn it off again.
We repeat this several times over six hours.
Place the dried apples in paper bags.
Recipe 6. Dried apples in the oven with cardamom
Ingredients:
Two kg of apples;
Half a lemon;
1500 ml water;
According to one article a spoonful of ground cinnamon and cardamom.
Cooking method:
Pour water into a container one and a half or two centimeters deep. Squeeze the juice of half a lemon into it. Stir.
We free the fruits from the core.
Cut the apple peel as thinly as possible.
We cut the fruit into rings five or six centimeters thick.
Place in a container with lemon water. After a minute, transfer the apple slices to a colander.
Place the fruit rings on a baking sheet.
Mix cinnamon and cardamom. Place in a strainer and sprinkle a thin and even layer over the top of the apple slices.
Place the fruit in the oven for 8-10 hours (70 degrees).
You can leave the peel on the apples. Then the dried edges of the fruit will be harder and curlier.
Recipe 7. Dried apples in the oven without skin
Ingredients:
A kilogram of apples;
10 gr. salt;
Four glasses of water.
Cooking method:
Prepare the saline solution: pour salt into water and stir.
Wash the apples thoroughly and shake off the water.
Remove the core and cut off the skin.
Cut the apples into longitudinal slices five or six millimeters thick.
Pour them into a saline solution. Let the fruit sit for about five minutes.
Drain the water and place the apple slices on a baking sheet.
Place in the oven and dry in the standard way.
Recipe 8. Dried apples in the oven with core
Ingredients:
A kilogram of apples;
Water - two liters.
Cooking method:
Prepare two saucepans with the same amount of water.
In one container, bring the liquid to a boil.
Cut clean apples into four parts, then into slices three to four mm thick.
Place the pieces in boiling water for half a minute, then in cold water for the same time.
Remove the fruit and dry it lightly with a paper towel.
Place the apples on the prepared baking sheet so that each piece lies separately.
Dry in the oven as usual.
Dried apples in the oven - tricks and useful tips
Apple fruits need to be processed in portions. It is wise to do this so that the cut pieces do not have time to oxidize and darken. A serving can be considered half a bucket of fruit.
To avoid darkening, apples should be kept in a saline solution (a liter of water + a tablespoon of salt) or in lemon water (a liter of water + the juice of half a lemon). Ten seconds will be enough.
It is more convenient to dry apples in an electric oven. If the gas stove does not turn off for several hours, then it becomes impossible to breathe in the kitchen. True, good ventilation saves the situation.
It is advantageous to dry at the beginning of autumn, when cool days arrive. The warmth of the oven will not only do the main job, but will also warm up the room comfortably.
You cannot pack dried fruits in plastic bags or containers, as they will “suffocate” and become moldy.
Properly dried apples should not be sticky, brown or burnt. Fruit pieces should be elastic and not brittle.
A rationally organized workplace will speed up and simplify the process. All necessary equipment, including a trash can, should be kept at hand.
Apples are the most affordable fruits that can always provide vitamins. The beneficial qualities even when dried are preserved for 10 years. Contrary to the belief that dried fruits are only good in compote, they can be eaten raw or added to baked goods, salads, cereals, etc.
If you know how to dry apples, preparing them will not be difficult. For this, varieties that are not very juicy, with thin skin and a minimum of seeds inside are suitable: aport, white filling, Antonovka, pepin.
What to do first
 Before drying apples at home, they are washed and prepared by removing moisture. Then the core is removed, damaged areas are cut out, and the peel is peeled. They are cut into slices with a thickness of 5 to 7 mm. The slices should be approximately the same size so that drying occurs evenly.
Cut apples oxidize, losing color very quickly. To prevent apple slices from darkening, there are protection options:
- Short-term treatment with steam or boiling water (blanching). This will help eliminate microorganisms from the surface of the raw material, maintaining shape, consistency, and aroma. At the same time, the slices turn pale; it’s not for nothing that “blanchir” (from French) is translated as “to turn white.” You can hold the colander with the slices over the steam for a little while and immediately immerse it briefly in cold water. It will be much easier to dry such apples.
- Protection against oxidation by saline solution. The raw materials are briefly filled with a solution prepared in advance: salt 1 tsp, water - 1 l.
- Vinegar treatment. Dilute 2 g of vinegar in 1 liter of water and keep the chopped fruit there for 2 minutes.
- Sugar method. Boil the syrup, immerse the apples, then take them out and put them in the refrigerator overnight. After drying, these are used for preparing sweet dishes.
Tip: self-grown apples that are planned to be dried are picked from the tree on a dry, not very hot day. You can't shake the apple tree. When falling, the fruits receive damage, which, although unnoticeable, is still harmful. These are not suitable for storage. Sour and sweet and sour ripe fruits are selected.
How to dry apple slices using different methods
If you have any doubts about how to properly dry apples, you should choose a convenient method for the conditions where it will take place.
Previously, apples had to be dried at home, especially in places with a humid, cold climate and little sunlight. And they did the same with fruits that were ripe in the fall. They were laid out on a Russian stove, lit for cooking, heated during the day and cooled slowly at night. In hot sunny climates it was easy to dry in the fresh air.
What you need to air dry
 The advantage of drying apples in the sun nowadays is that there is no need to waste paid energy. It’s good that large volumes of workpieces can be made this way. Dry in the open air, laying out the slices in one row, away from each other. Place them on nets, baking sheets, grates covered with cloth, protecting them from insects with a gauze cape on top. You can string it on a strong thread and hang it where the sun's rays reach the maximum. It is necessary to dry in a shaded place, if there is no moisture, the apples will dry well too, but it will take more time. Under no circumstances should the harvested raw materials be exposed to rain. This is a minus, because tracking is required, you need to remove it in time, then put it away again, etc.
If you can’t dry apples in an apartment, especially a city apartment, without a balcony, then kitchen appliances will come to the rescue.
Can you dry it in the microwave?
 The fastest way is to dry apples in microwaves. Before drying in the microwave, a portion of apples (as many as can fit in one layer on a plate) is washed, cut, and freed from moisture. You can grate it into circles with a special grater, like chips. Cover the plate with a plain cloth and place the apples. With a power of 200⁰, it will be ready in 3 minutes. If not enough, add 30 seconds at a time. When ready, the color changes, the skin wrinkles, and stickiness appears. If the color was not preserved previously, now you can sprinkle with lemon juice to keep it creamy.
Features of oven drying
 To dry apples in the oven without getting burnt, there are little tricks. First, you should familiarize yourself with the differences in the cooking process with an electric and gas appliance:
| In an electric oven | In the oven of a gas stove |
|---|---|
| Preheat to 60⁰, gradually increasing to 80. | Turn on and heat to 220⁰. |
| Place the apples loosely on baking paper in one layer. | Line a baking sheet with parchment and lay out the slices. |
| Place the paper on baking sheets or oven racks. | Be sure to place it on the lowest tier. |
| Towards the end of cooking, reduce the temperature as necessary. | Dry for 60 minutes. on each side (120 minutes - to get a crispy dried treat like chips). |
| After 2 hours, turn the slices over. | |
| Dry for 6 hours (sour, hard - longer). |
Another important detail: the door of any type of oven must be left ajar to prevent moisture from accumulating. At the end of the process, dried apples must be cooled naturally.
If you dry it with an electric dryer
 Electric drying of apples has its own rules:
- Sweet varieties are taken more often.
- It’s better not to wash, just choose cleaner fruits and wipe with a damp cloth.
- Cut into slices, the thickness of which is no more than the thickness of the drying baskets.
- Place at a distance so that each slice can be freely blown with dry air.
- Dry for 8 hours or more depending on the size of the cut, the number and type of apples.
There are various recommendations at what temperature to dry apples. If it is possible to immediately set the temperature regime in the electric dryer, then it is better to decide on 75 degrees. Of course, the temperature can be increased to +110⁰, but we must remember that the higher it is, the less beneficial properties dried fruits will retain. It is also important not to leave dried apples in the dryer with the lid closed. So they will grab moisture again and you will have to start all over again.
What are the benefits of air frying?
 Despite the fact that the drying process in an air fryer is very similar to using an electric dryer, it proceeds much faster - 60–90 minutes, which saves time. In addition, apples prepared in this way for the winter are better stored. They need to be grated to a thickness of 3 mm and placed on the grill of the device. At t +110⁰ with lower blowing mode, everything is usually ready for an hour. You need to check and make sure that there is no moisture left at all, otherwise the product will become moldy. The dried fruit feels like a raisin: if you squeeze it, it should not feel cool or damp.
If you dry it with a slow cooker
 A small amount of apples can be dried in a slow cooker at a time or in portions over several uses. The advantages here are that she will do everything herself quite quickly and without much fuss. To do this, the apples are laid out loosely on the bottom of the bowl, in one layer. The baking mode is turned on for 1 hour. The readiness is checked and the slices are turned over to be sure. For another 10 minutes, the same mode is turned on for the other side.
Tip: it is better to dry in an open place on the southwest side, turning it over periodically. On the balcony they turn over up to three times a day. You don’t have to peel homemade apples; besides, summer varieties are recommended to be dried with the skin on, while store-bought fruits should be peeled. It is advisable to cut into slices, not circles, as this will dry faster. You need to prepare the fruits in parts, so they do not have time to oxidize. Ready-made dry apples can be ground with a coffee grinder into apple flour and added when baking.
How to dry apples is not a problem when you know that in almost any conditions it is possible to prepare them for future use.
A rich harvest of apples has ripened in your garden, and you don’t know what to do with them? Try making healthy dried fruits from these summer fruits, which you will use to prepare original dishes. Our article will tell you how to properly prepare apples for drying, and will also introduce you to the most popular methods of preparing this product for the winter.
Around the end of July, it is time to harvest apples. If the harvest of these fruits in your garden exceeds all expected quantities, you can afford not only to make jam and marmalade, but also to dry them for the winter.
- Drying apples is considered the simplest and most affordable way to prepare this product. The best part is that in this case you don’t have to spend extra money on sugar or stand at the stove for hours. A certain temperature will help you bring the apples to the desired consistency, and will do this practically without your participation.
- Fruits prepared in this way retain almost all vitamins and microelements in their composition, and, unlike jam and jam, do not contain a large amount of not very healthy sugar. All these beneficial substances will help your body survive the cold winter, and in the spring they will save you from vitamin deficiency
- In addition, dried fruits are a product with which you can prepare a lot of tasty and aromatic dishes. Properly dried fruits can be an excellent filling for a pie, an addition to sweet pilaf, an interesting component of winter salads, and even aromatic tea leaves.
At what temperature and for how long should apples be dried?
The optimal temperature for drying apples is 50-70 degrees.- Some housewives want to speed up the process of drying apples and therefore use rather extreme temperatures for this. In principle, they speed up the drying process, but at the same time, their beneficial substances leave the fruit with the liquid.
- Therefore, if you are trying to get a truly healthy product, then make sure that the temperature in the oven or electric dryer does not exceed 70 degrees. And then such a temperature can only be set at the initial stage, for the period while the fruits are intensively losing their moisture
- After they have at least halved in size, the temperature should be reduced to 40-50 degrees. Such temperature indicators are as close as possible to natural ones, which means that you can preserve not only vitamins and microelements, but also the natural taste of the finished product
- But remember, even low temperatures can dry out apples, so it is extremely important not to forget to carefully turn them over every two hours. This way you can achieve uniform drying and ideal consistency of dried fruits.
- If you do not do this, the finished product will dry out so much that it will lose almost all of its taste. And you can only use such apples for making compotes and jelly. Depending on the chosen method of preparing apples for the winter, drying can last from several hours to 10-14 days
How to properly prepare apples for drying?
 Preparing apples for drying
- We all know that apples consist of almost 90% ordinary water, which, during the drying process, evaporates under the influence of high temperature, leaving us with only healthy dietary fiber and vitamins. But it’s clear that in order to get perfect drying you need to use the highest quality fruits for its preparation.
- Therefore, whenever possible, try to use fruits from your garden for winter harvesting. If you don’t have it, then try to find apples grown in our country at the market or in a store. Since they will not need to travel and be stored for a very long time, they will not be treated with substances that prolong the life of imported fruits
- After the fruits are delivered home, be sure to wash them thoroughly under running water and sort them by size. Thanks to this, during the cutting process you will get almost identical pieces, which means that the fruit will dry as evenly as possible
- Also, look very carefully to see if there are any beaten or rotten apples among the purchased products. If you find such fruits, then simply put them aside. Since the fermentation process usually begins quite quickly in places of damage, it is strictly prohibited to use such fruits for drying.
- Such fruits, after exposure to high temperatures, will not have a completely normal taste and, most unpleasantly, will be stored worse. After sorting, you can proceed to core the apples and cut them into thin slices
- If we talk about the thickness of the lobules, it can range from 3-7 mm. After cutting, it is best to immerse the fruit in boiling water for a few seconds or soak it in salt water. This will allow the apples to retain their natural color and not oxidize before drying begins.
Drying apples for the winter in the oven on a baking sheet
 Rules for drying apples in the oven on a baking sheet
- Dried apples are the most popular dried fruits in our country. People love this product for its beneficial properties and, of course, for the fact that every person can prepare these fragrant fruits for the winter. One of the most accessible methods for preparing apples is oven drying on a baking sheet.
- Moreover, both gas and electric stoves are equally suitable for this task. The only thing you should take into account is that if you use an electric oven for these purposes, then at the initial stage the temperature can be raised to 80 degrees
- The temperature should not rise higher than this, as this can lead to the fact that the fruit will simply begin to cook in its juice

 Oven dried apples
Rules for drying apples in the oven on a baking sheet:
- Turn on the oven and preheat it to 50 degrees. Make sure that the temperature does not exceed these values too much. If they are very high, the apple slices will become covered with a crust, which will not allow them to dry properly.
- While the oven is preheating, rinse and core the apples. Place the fruits cut into slices in one layer on a baking sheet previously covered with baking paper.
- Place the apples in the oven and open the door slightly. This will allow air to circulate and the liquid in the fruit will evaporate properly.
- After about two hours, stir the apples and leave them in the oven for another hour and a half. When you see that they have significantly decreased in size, close the oven tightly, increase the temperature to 70 degrees and wait another 1 hour
- After this, we again reduce the temperature to 50 degrees, open the oven door slightly and leave the fruit in this position for about another 3 hours. As soon as you see that the apple slices have become slightly brownish and elastic to the touch, remove the baking sheet from the oven and let the dried fruits cool
- Place the completely cooled apples in a glass container with a hermetically sealed lid and place them in a kitchen cabinet for storage.
How to dry apples for the winter in the sun?

 Drying apples in the sun
- If you want to try drying apples in the sun, then choose the optimal warm period for this. Ideally, ambient temperatures should exceed 30 degrees for at least 4-5 days in a row
- In principle, they can be a little smaller, but then it will take at least 7 days to prepare dried apples. Therefore, if possible, check the forecast and, if the weather is sunny and cloudless for the next week, start preparing for drying apples in the sun
So:
- Find a place in your garden that receives direct sunlight all day long.
- Place a table there and cover it first with polyethylene and then with clean paper
- Wash and cut the apples and soak for 5-10 minutes in acidified water
- Drain the water and transfer the fruit to a colander. Leave them in this position until they are completely free of water.
- Then transfer them to a paper towel and let dry at room temperature.
- When the apples are slightly wilted, transfer them to the prepared table and carefully cover with gauze.
- Be sure to cover the apples, otherwise wasps, flies and other insects will land on them.
- Try to mix fruit slices at least 2-3 times a day
- If you want the process of drying apples in the sun to be as short as possible, then be sure to take them home overnight
- After 5-7 days they will turn dark brown and can be transferred to jars for further storage
How to dry apples on a string?
 Drying apples on a string
- Another popular way to store dried fruits for the winter is to dry the fruits on a string. In this case, you don’t have to wait until the weather is consistently sunny outside, because you can bring the apples to the desired consistency on the open terrace, balcony and even attic
- The main condition for such drying is a large open space and, of course, the most sterile conditions possible. With this drying method, approximately 1 kg of quality product is obtained from 10 kg of fresh fruits
- Take your favorite apples, rinse them under running water, remove the core and cut into slightly thick slices
- If their thickness is very small, they will simply break and you will not be able to thread them
- Make sure that the finished slices have the same thickness. This will promote proper and uniform drying.
- Thread the chopped apples onto a thick thread, leaving a little space between the slices.
- Place some kind of garlands in the attic or terrace, and if necessary, cover them with gauze
- If you are drying indoors, then at least during the day, create a slight draft in it.
- Air circulation will contribute to faster and more uniform drying of fruits
- In approximately 10-14 days, your drying will be ready and all you have to do is put it in a storage container
How to dry apples for the winter in an electric dryer?

 Drying apples in an electric dryer
- If you want to dry apples as quickly and efficiently as possible, then spare no expense and buy yourself a high-quality electric dryer. Such a kitchen assistant will prepare delicious and healthy dried fruits for you, almost without any outside help, which you will be very happy to use for preparing fortified dishes.
- The only thing you should pay special attention to in this case is the thickness of the apple slices. If it is greater than the thickness of the trays of the kitchen appliance, then the warm air inside the electric dryer will not be distributed quite evenly, and this can lead to the fact that one part of the apples will be completely ready, while the other will still be half-ready
Rules for drying apples in an electric dryer:
- Cut the pre-washed apples into slices of the desired thickness
- Carefully (in one row) place them on pallets
- Place all the trays in the electric dryer and turn on the device.
- Make sure that the temperature sensor does not exceed 55 degrees
- Leave the apples to dry for at least 7 hours
- After this time, unplug the device and check the readiness of the dried apples
- If they are dry to the touch and do not release juice when pressed, then feel free to transfer them to a glass container
- If you notice even minimal moisture release, leave them to dry for another 2-3 hours.
How to dry apples in the microwave?

 Drying apples in the microwave
- Nowadays you can see a microwave oven in almost every kitchen. This kitchen assistant for the modern housewife makes the daily worries of the ever-busy woman as easy as possible. Quite a lot of housewives take great pleasure in cooking meat in the microwave, baking pies and cooking porridge.
- But if you know how to use this miracle of modern technology correctly, then you can use it to dry apples quite well. The best part is that it will take you literally 5-7 minutes to dry one portion.
So:
- Cut the apples into slices or circles and place them in one layer on a flat plate.
- Set the power timer to 200-300 W and turn on the microwave
- After 2 minutes, turn off the oven and turn the apples over to the other side.
- Close the microwave door and wait another 2-3 minutes
- If your apples were cut into very thin pieces, then this time will be enough for them to dry.
- If after this time they are still sticky to the touch, turn on the timer for another 1-2 minutes.
How to dry apples in an air fryer?

 Drying apples in an air fryer
- If you have an air fryer in your kitchen, then this miracle device can also be used to dry apples for the winter. In the case of an air fryer, you can even try to prepare a not quite ordinary drying. If, before turning on the device, sprinkle the prepared apples with cinnamon, vanilla or ginger, then you will get an excellent flavored filling for winter pies
- And if you make the slices a little thicker than usual, then the finished product can be used as a light and tasty snack that will not overload your stomach if you want something tasty late in the evening
Drying apples in an air fryer:
- Wash the apples, remove the core and cut into slices 5-8 ml thick
- Boil water, dissolve a couple of tablespoons of table salt in it and dip apples into the resulting liquid
- After just a couple of seconds, drain the water and let the apple slices drain in a colander
- Remove any remaining moisture from the apples with a paper towel or cotton towel.
- Place the fruits in a single layer on the air fryer grid, sprinkle them with cinnamon and turn on the device
- Adjust the timer to low airflow at 100 degrees
- After 50-60 minutes, turn off the air fryer and check the readiness of the apples
- If they are a little sticky, then continue to dry them for another 20-30 minutes.
Is it possible to dry green, unripe apples, white filling?


- In principle, drying slightly unripe apples is quite acceptable. It’s just that when using such a product, you should be prepared for the fact that you will have to add a little more sugar or honey to compotes and pie fillings
- But if the apples are completely green, then using them to prepare healthy dried fruits is prohibited. And the point here is not that they will give a very strong sourness. A completely green apple does not have the taste or beneficial qualities of a ripe fruit, so even when dried it will not bring you much benefit. You will simply waste your time and money, and in return you will receive a tasteless and sour product that you are unlikely to use for food
- If we talk about white filling, then it is also better not to use it for preparing dried fruits for the winter. This apple, when ripe, has a rather loose structure, which, after drying, turns into an almost tasteless product. To prepare drying, it is best to use denser and juicier varieties that ripen closer to autumn and have a sweet and sour taste. It is from these apples that the most delicious and aromatic winter dried fruits are obtained, which help to diversify the same type of winter dishes
Video: Harvesting apples for the winter. Drying apples in a dryer
This year there is a big harvest of apples. Many people don't know what to do with them. I want to suggest a wonderful recipe drying apples in the oven. This drying method is perfect for urban conditions. It is better and more convenient to dry apples in an electric oven; in a gas oven it is more difficult, since the air becomes heavy from long-term operation of the oven. Any variety of apples is suitable for drying. If you peel the apples from the core with seeds and hold them in sugar syrup, then you will get dessert dried apples that you can chew with pleasure. And if you simplify the process, do not remove the core with seeds and do not keep it in sugar syrup, then you will get excellent dried apples for compotes and jelly. Dried apples keep well in paper bags for 1 year at room temperature.
Ingredients
To dry apples in the oven you will need:
apples - any quantity;
sugar - arbitrary amount;
water - arbitrary amount.
Cooking steps


Place the chopped apples in a saucepan and pour in the cooled sugar syrup. For the syrup, boil water and add sugar to taste. Pour the syrup up to the level of the apples. Place the pan with apples in a cool place for a day.


Bon appetit and a delicious winter to you!
How to properly dry apples at home Let's talk in this article. Scientists say that people have been eating apples for 165 million years. In Rus', apples were revered and loved from young to old. In central Russia, an apple tree grew in every garden or dacha. The fruits ripen at the end of August, and the owners try to preserve the delicacy for as long as possible.
Many preparations are made from apples: jam, marmalade, juice, marshmallow, compote, jam, mousse. But there is a common, labor-intensive and cheapest option for storing apples - drying them. At the same time, the product retains its beneficial properties and nutrients, as in fresh apples.
What are the benefits of dried apples?
Scientists confirm that dried fruits, including apples, help fight cancer, cardiovascular problems, chronic kidney and genitourinary diseases. In addition, they have the ability to cleanse and strengthen blood vessels, reducing the level of bad cholesterol in the blood. Regular consumption of food will speed up the growth of bone tissue in women during menopause, which is the prevention of osteoporosis.
Interesting! Nutritionists advise consuming at least 75 grams of dried apples, which is equal to two fresh fruits. They include:

How how to properly dry apples at home to preserve these beneficial properties? There are several different ways. One of them is oven drying.
How to dry apples in the oven
Which varieties to choose?
It is better that these are winter apples, sour or sweet and sour:
- Anise,
- Antonovka,
- Aport,
- Titovka,
- Borovik,
- Slav.
Summer sweet fruits and even carrion are used for drying, but they are dried with a crust, and the final product is of lower quality.
Preparation
- Apples are processed in portions, approximately half a bucket. It’s better this way, because they won’t have time to darken and oxidize. You can stop oxidation and preserve the color of the slices using a saline solution (recipe below).
- The apples are washed and dried so that there is no excess moisture left and drying is faster.
- The next step is to remove the core. This is done in a proven way, by cutting into quarters and removing inedible parts. Or you can do this with a device in the form of a tube with sharp edges.
Advice! Of the dried fruits that will be used for compote, you don’t have to cut out the middle.

Now let's start drying the apples directly.
Fruit drying process
- Place parchment paper on baking sheets.
- Sliced fruits are laid out on it.
- The oven is preheated to 80 degrees, apples are placed in it for 30 minutes.
- After this, the temperature drops to 70 degrees.
- After 5 hours, half of the moisture has evaporated, and they are turned over to the other side and the temperature is lowered to 50 degrees.
- To obtain well-dried fruits, it is better to leave for another 4 hours, turning occasionally.
Drying is considered complete when the apples become light brown. They should not release juice or break when squeezed. It is better to store them in kraft paper bags or canvas bags. The place should be dark and dry, storage temperature should be room temperature.
Watch the video! How to dry apples in the oven
In the microwave
Drying in the microwave will significantly speed up the process of preparing dried fruits from apples. The main thing is to choose the right power and cooking time so as not to burn the workpiece.
Drying occurs in two stages:
- At the first stage, you need to put the apples on a plate, preferably in one layer, and put them in the microwave for 30-40 seconds at a power of 250 W.
- At the next stage, you need to remove the plate, turn the pieces over and set them for another 3 minutes at 300 W. If it seems that the drying is not ready yet, you can leave it for another 20-30 seconds. Now you can put them in containers and send them for storage.
In an electric dryer
The best choice for prep drying is an electric dryer. You can store fruits, vegetables, mushrooms, medicinal herbs, berries and even meat or fish products in it for the winter. Now they are gaining popularity, especially for those who have a dacha, because they give the opportunity fast do drying.
Operating principle of an electric dryer
This device is easy to use and does not require any special skills. The electric dryer consists of:
- a plastic container that looks like a saucepan with high sides;
- pallets with through holes where fruits and vegetables are placed;
- The set includes small nets for drying berries and strips for marshmallows;
- a lid with holes through which steam escapes;
- base with a compressor that pumps hot air to dry food.
The air temperature is regulated, it is added if the product is very juicy.
Drying process
- Apples cut into slices are placed in pallets. They can be stacked in a container on several floors.
- For proper drying it will take 8 hours, at a temperature of 55-60 degrees.
- When completing the process, you need to make sure that the apples do not release moisture when you press them.
- If they are well dried, they can be put into bags and sent for storage.
Watch the video! Drying apples in a dryer
On the street
To save energy, many people prefer to dry apples. in the sun. This method will not be effective if the weather is humid and not sunny.
Apples ripen in late summer and early autumn; it often rains at this time. You can start drying in the fresh air and finish in any other convenient way, in the oven or microwave, for example. There are a couple of ways what's best dry apples outside.
- The sliced fruits are laid out on a grid with cells or on trays. The circles should not be very thick. Apples need to be covered with gauze or canvas to prevent dust and pests from getting on them. In the evening, it is better to remove the containers indoors, because the humidity rises at night.
- You can use the method of drying mushrooms. String the apples on a thread or skewer and hang them in the sun. Dry outdoors for 4-6 days, then bring into a dry room. Avoid exposure to moisture.
How do you know when dried apples are ready?
- The skin should darken and the flesh should not stick. If you press a piece with your finger and it does not crush, then the dried fruits are ready.
- The color of the final product should not be surprising. It depends on the type of apple. The pulp of summer fruits is lighter in color and dries faster. The color can also be affected by the drying method, ranging from greenish cream to dark brown. But don't be too zealous about drying. Dark, overdried fruits have fewer vitamins than light, properly dried apples.
How to store
When the required amount of fruits has been dried, the question arises of how to properly store them so that the work does not go to waste.
You should sort through the dried fruits after drying, in case individual pieces need to be dried. Using the “grandmother’s” method, you can pour the whole group into a pillowcase so that they all together acquire the same level of humidity. They are left like this for a couple of weeks, then sent to fabric bags for storage.
Can be stored in a cardboard box or paper. It is not recommended to store in plastic bags or plastic containers to prevent them from becoming moldy.
Watch the video! The easiest way to dry fruits
In contact with