Red velvet cake cream. Red velvet cake new version
A very tasty, delicate and original red velvet cake is sure to please even novice housewives. This spectacular dessert can be easily prepared at home, served at the holiday table and delighted family and friends with its culinary skills. We offer a selection of descriptions, as well as reveal several secrets of preparing delicious dessert cream and methods of decoration.
Red Velvet Cake - Classic Recipe
The initial recipe consists of the following list of ingredients used:
- flour - 330 gr;
- sugar - 300 gr;
- oil drain - 150 gr;
- post oil - 150 gr;
- eggs - 3 units;
- buttermilk (kefir/milk + 1 tablespoon lemon juice) - 270 g;
- red food gel coloring - 2 teaspoons. l.;
- cocoa powder (preferably granulated, it is more chocolatey) - 1 table. l.;
- baking powder - 1 tsp. l.;
- soda - 1 teaspoon l.;
- salt - ¼ teaspoon. l.;
- vanilla extract - approximately a few drops.
Step-by-step process for preparing the dough and baking the cake:
- If you couldn’t find buttermilk, do the following: add lemon juice to the dairy product and leave it for a while.
- Mix dry ingredients in a deep and wide bowl.
- Using a mixer, beat softened butter with sugar and salt until fluffy. Next, add all the eggs and vanilla one by one, and work with the mixer again.
- Add coloring to buttermilk or its substitute and stir the mixture. Add odorless vegetable oil to the dough.
- Add the flour and other dry ingredients in 3 batches, alternating with the colored mixture, and after each time beat thoroughly until smooth.
- Bake the cakes in a pan lined with parchment paper in the oven at 180 degrees, about 30 - 40 minutes.
- It's best to make the biscuits the day before so you can keep them in the refrigerator overnight. But if you don’t have time, then 2-3 hours is enough. This will make the cakes even juicier.
On a note. To ensure the butter whips easily, leave it at room temperature an hour before using.
How to cook in a slow cooker?
The cake can be prepared using a multi-cooker oven. It will help you bake tender and soft shortcakes.
A cake in a slow cooker is prepared from the following products:
- flour - 340 gr;
- eggs - 3 units;
- sugar - 300 gr;
- oil drain - 200 gr;
- post oil - 120 gr;
- kefir - 200 gr;
- cocoa - 2 table. l.;
- soda and vanillin - 1 teaspoon each. l.;
- dye - 1 table. l.;
- baking powder - 1.5 tsp. l.
First of all, sift the flour and cocoa with a sieve to remove lumps from the mixture, and mix them with the rest of the dry ingredients. Pour the dye into the kefir and stir thoroughly using a fork/whisk.
Beat the sweet egg mass with a whisk. Without stopping work, gradually add soft butter and add vegetable oil. Pour in the dry products and the dye diluted in kefir, introducing the mixture in small portions.
Pour the resulting dough into the multicooker container and set the “Baking” program for 1 hour 25 minutes. If the biscuit is not baked during this time, add another 10-15 minutes. Leave the biscuit to heat for another third of an hour.
Divide the baked goods into several equal layers, layer them with cream, and decorate them as you wish.
Red velvet - original recipe
The original recipe will definitely find its fans among lovers of home baking.

The dough is prepared from the following products:
- flour - 310 gr;
- cocoa - 2 table. l.;
- soda - 1 teaspoon l.;
- salt;
- oil drain - 113 gr;
- sugar - 300 gr;
- eggs - 2 units;
- post oil - 220 g;
- vinegar - 1 teaspoon l.;
- vanilla extract - 2 tsp;
- buttermilk - 240 gr;
- dye - 35 - 50 g.
For the cream you will need:
- powdered sugar - 156 g;
- cream cheese - 0.5 kg;
- vanilla extract – 5 g;
- cream (fat) - 300 gr.
For the dough, mix the dry products, combining until the color is uniform. Process the softened butter and sugar with a mixer until the mass becomes very light and increases in size, then add the eggs one by one. Pour in the oil and vinegar, whisking continuously, add vanilla extract and buttermilk.
Then combine the dry mixture with the oil base. Add the dye in such a concentration to get a rich red tint.
Lightly coat the baking dish with oil and sprinkle with flour. Place in the oven to bake for half an hour at 180 degrees. Cool the cake for 10 minutes and remove from the pan.
For the cream, combine the powder with soft cream cheese, add vanilla extract and process until a homogeneous, smooth structure is obtained. To do this, it is recommended to use a mixer or immersion whisk. Whip the chilled cream and carefully add it to the cream mixture, stir.
Cut the cake lengthwise into two equal parts. You can even out the top cake by cutting off the top in a thin layer. In the future, the trimmings can be crushed into crumbs and used as a topping. We coat the cakes with the prepared cream, not leaving the sides unattended. Decorate the top and sides with crumbs and serve.
How to make it at home with beet juice?
Beetroot juice is a natural coloring for dessert.


We suggest trying the following option:
- flour - 350 gr;
- sugar - 350 gr;
- oil drain - 270 gr;
- cocoa - 30 gr;
- kefir - 150 gr;
- beet juice - 60 g;
- vinegar - 7 g;
- baking powder - 8 gr.
Step-by-step preparation:
- Beat sugar and butter at room temperature. Mix the dry products, sifting them through a sieve.
- Grate one beet and squeeze out the juice. Mix kefir, vinegar and beet juice.
- Mix all the mixtures, starting and ending with the dry mixture, the mass should be homogeneous.
- Line 2 baking dishes (18 -20 cm) with parchment paper. Bake in the oven at 175 degrees. 40-45 minutes.
Recipe from Gordon Ramsay

- flour - 450 gr;
- baking powder - 20 g;
- salt - 5 g;
- powder dye (red) - 30 g;
- cocoa - 50 gr;
- olive oil (continuous) - 100 g;
- sugar - 300 gr;
- eggs - 3 units;
- vanillin - 10 g;
- low-fat cream - 250 g;
- cream cheese - 250 gr;
- oil drain -150 gr;
- vanillin - 5 g;
- powdered sugar - 200 g.
Mix dry products in a bowl.
Combine soft butter in a deep bowl with sugar using a mixer. Then add half of the dry mass and work with whisks again. Next, pour the eggs and kefir into the resulting mixture and beat again. After this, add the remaining dry part and bring the dough until smooth.
Bake in a lined pan at 180 C until the cake is ready, which can be checked with a toothpick or skewer.
For the cream, beat soft cheese and warm butter at minimum speed, then add vanillin along with powdered sugar, while gradually increasing the speed. The readiness of the cream consistency is determined as follows: the structure should be dense, but at the same time filled with air and light.
On a note. The cake can be decorated with seasonal berries or fruits, lightly covering them with melted chocolate (white or black). You can also use sweets as decoration - dragees, marmalade, dried fruits.
Red Velvet Cake by Andy Chef
Andy Chef's mousse cake is somewhat popular, as are other types of desserts by this chef.


You need to prepare the products in advance in the following quantities:
- flour - 340 gr;
- sugar -300 gr;
- cocoa - 1 table. l.;
- salt - ¼ teaspoon. l.;
- baking powder - 2 tsp. l.;
- soda - 1 teaspoon l.;
- eggs - 3 units;
- post oil - 300 gr;
- buttermilk (kefir) - 280 g;
- dye - 2 tsp. l.
Combine the dry ingredients in a container with a spoon. Next, add eggs and vegetable oil. At the end, add buttermilk or kefir along with dye. Stir everything well and leave aside for ten minutes so that the interaction between the soda and the fermented milk product begins.
Cover the mold (16-20 cm) with a thin layer of oil and line the bottom with oiled parchment. Pour the dough into a mold and bake at 170 degrees. for a third of an hour. Periodically you need to check the readiness of the baked goods using a skewer.
On a note. When decorating the cake, you can add pieces of canned fruit or berries to the cream. This technique will make the dessert more juicy, refreshing, light and pleasant to the taste.
How to decorate a cake?
After preparing the base and cream, the question arises - how to decorate a red velvet cake? The finished dessert with a smooth, chilled surface can be decorated as desired.

Traditionally, the surface of the cake is sprinkled with red sponge crumbs, but you can add beautiful accents in the center or along the edge using cream and a pastry bag with various nozzles.
In another case, you can sprinkle crumbs not on the entire surface, but only on the sides or edging, add various patterns using a pastry bag and colored creams or melted chocolate.


If you have strawberries in your arsenal, they will perfectly complement the design.
Another option for decorating the cake is to sprinkle the white base with red crumbs on top, and arrange flowers around it using a pastry bag.
Several options for cake cream

- The traditional frosting for red velvet cake is buttercream. Its recipe is simple, consisting of three ingredients: cream cheese, cream and powdered sugar. Everything is whipped and the cake is decorated.
- You can offer another option, which will make the cake no less delicious. If you don't have cream on hand, you can replace it with butter.
- Or version: butter and “Frosting Vanilla” mixture by S. Pudov. This mixture is the basis for any cream; it holds its shape well, so it can be safely used to decorate a dessert.
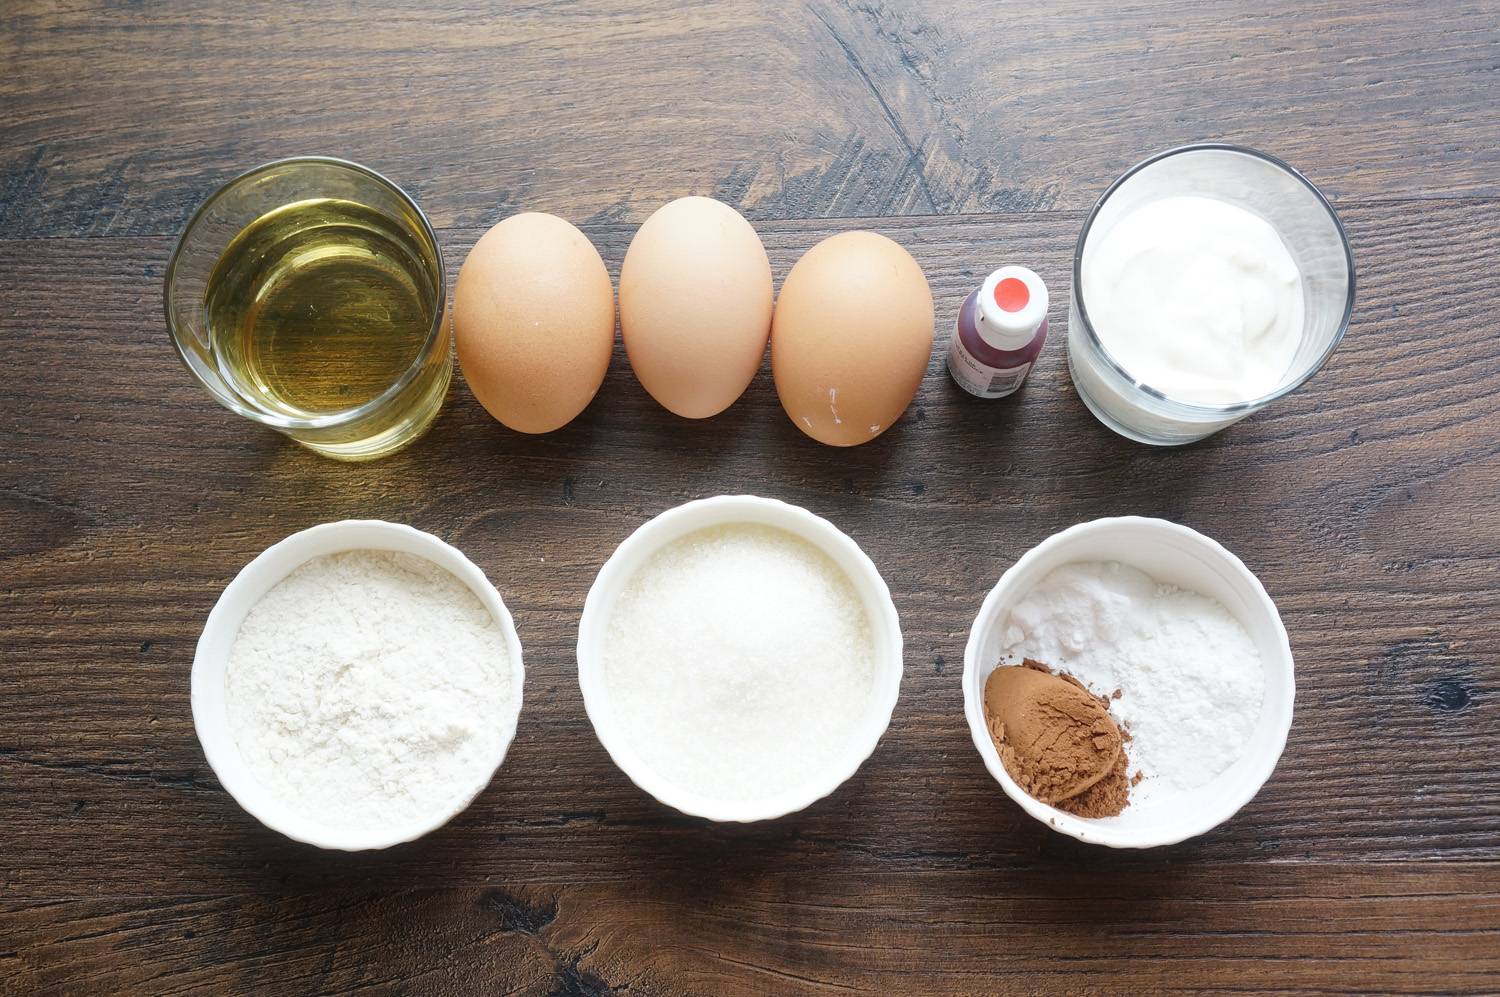
- Flour - 340 g
- Sugar - 300 g
- Cocoa - 5 g
- Salt - 1/4 tsp.
- Baking powder - 5 g
- Soda - 3 g
- Eggs - 3 pcs
- Vegetable oil - 300 g
- Buttermilk/kefir – 280 g
- Gel dye - 2 tsp.
Just don't say you haven't heard of Red Velvet (more correctly called Red Velvet).
Note to the owner - there are many theories regarding its origin. Some believe that its recipe originated in the Southern part of the United States, while others believe that the cake recipe originated in the Northern part. But what is certain is that this cake has become a favorite dessert of Americans and Canadians in recent decades.
The bright red color of the cake contributed to the fact that Red Velvet Cake became known as Devil's Food. John Mariani, in his book A Dictionary of American Food and Beverage, suggests that the cake came to be called Devil's Food due to its amazing taste, which some moralists may consider sinful.
Now I’ll explain why this is an ultra popular dessert. Look at the appearance: bright red cakes and snow-white cream. The classic cake is completely covered in cream on the outside, but I wanted to evoke more expression and passion, so I made it “naked.” It is incredibly bright and catchy, and besides, I don’t know of any other cake that’s even slightly similar.
It has very porous and moist cakes, they literally melt in your mouth, but that’s not the point. The whole trick is in a small amount of cocoa, which is added to the dough, but is masked by the red color. That is, when you bite off a piece, you expect anything but a chocolate aftertaste. This is a cake that deceives perception and surprises again and again. I’m not exaggerating, with every bite I was again surprised, “Oh, it’s chocolate,” because it doesn’t look like that from the outside.
Add buttercream, which most of my subscribers are in love with, and you will get a cake that you will want to make again, again, again...
Andrey Rudkov
If you need any ingredient, confectionery equipment and equipment, come to my store - dvemorkovki.ru. I plan that it will become the most convenient store for those who love to cook. An up-to-date showcase, many payment and delivery methods (all over the world), I have my own store in Moscow and products that I select myself and ingredients that I use on the blog. Come in!
Ideal things are, perhaps, ideal in everything. The dough is so simple that there are even no criteria for what ingredients to add when. I didn't turn on the mixer at all until I added the final ingredient. Isn't that great?
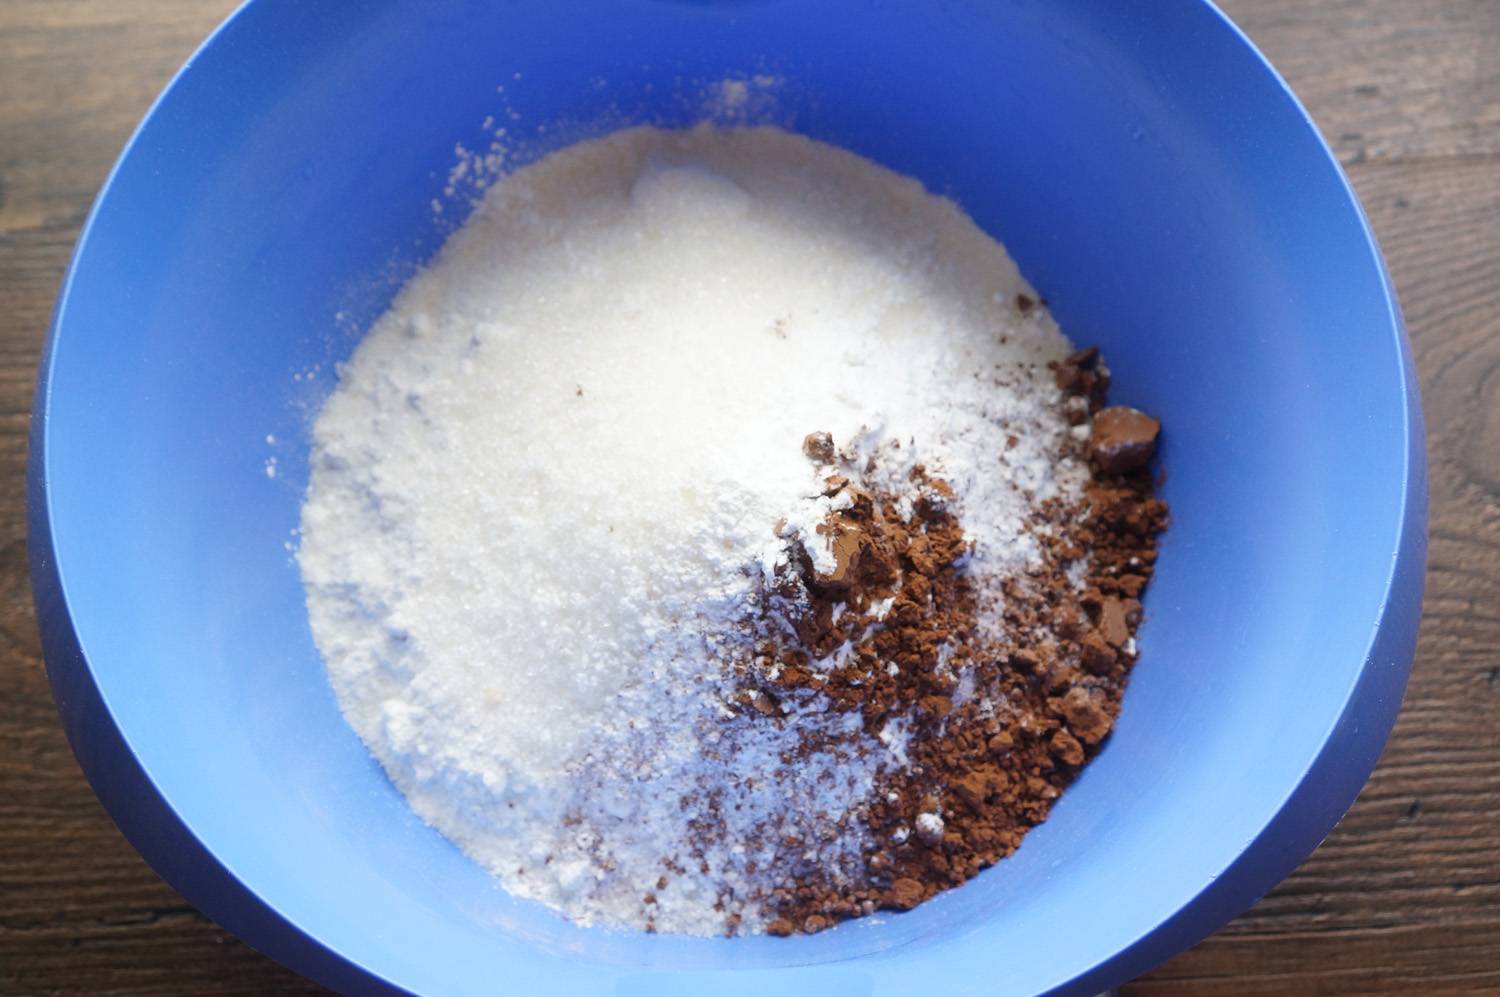
In a bowl, mix flour (340 gr.), sugar (300 gr.), alalized cocoa(5 g), 1/4 tsp. salt, soda (3 g), baking powder (5 g).

At the end you need to add buttermilk (280 g). I replaced it with low-fat cream 10% (150 g) and sour cream 20% (130 g), you can just take thicker kefir. And red food coloring. The highest quality and most effective result is AmeriColor Red Red (or Super Red).
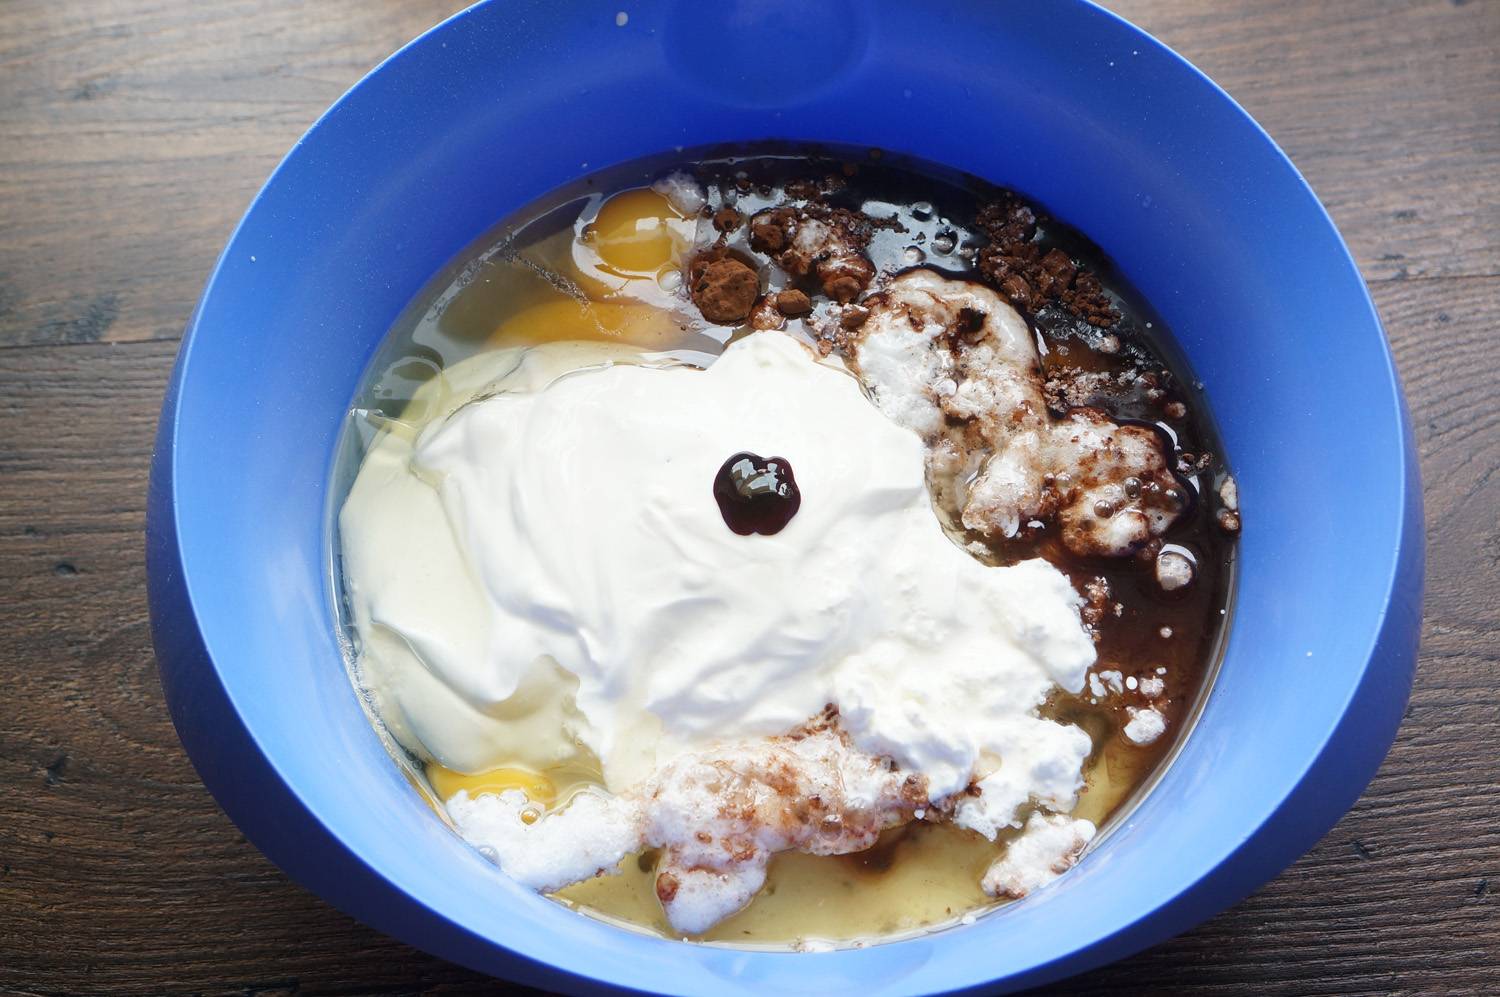

The dough will be quite liquid, don't be alarmed, that's how it should be. Leave it for 10-20 minutes, the thing is that the soda needs some time to react with the milk ingredient.
Grease the pan with butter and place parchment on the bottom. And pour out the required amount of dough. I made three cakes of 16 cm each. Or it will be two of 18 cm each. To be completely professional, first weigh the empty bowl, and then the bowl with the finished dough. Through mathematical calculations you will understand how much dough to pour into the mold for each cake.

Bake at 170 degrees for 20 minutes. Watch carefully. At the 15th minute I started checking with a skewer. As soon as it began to come out dry, I took out the mold. Let the cake cool in the pan on a wire rack for 2 minutes, and then carefully remove the cake onto a wire rack.
Cool the pan (I just rinse it with cold water), grease it again with oil, put the parchment on the bottom and go ahead. When the cakes have cooled, wrap each with film and put in the refrigerator for 2 hours.
After two hours, take out the cakes and carefully cut off the top - most likely it will rise a little in the center.
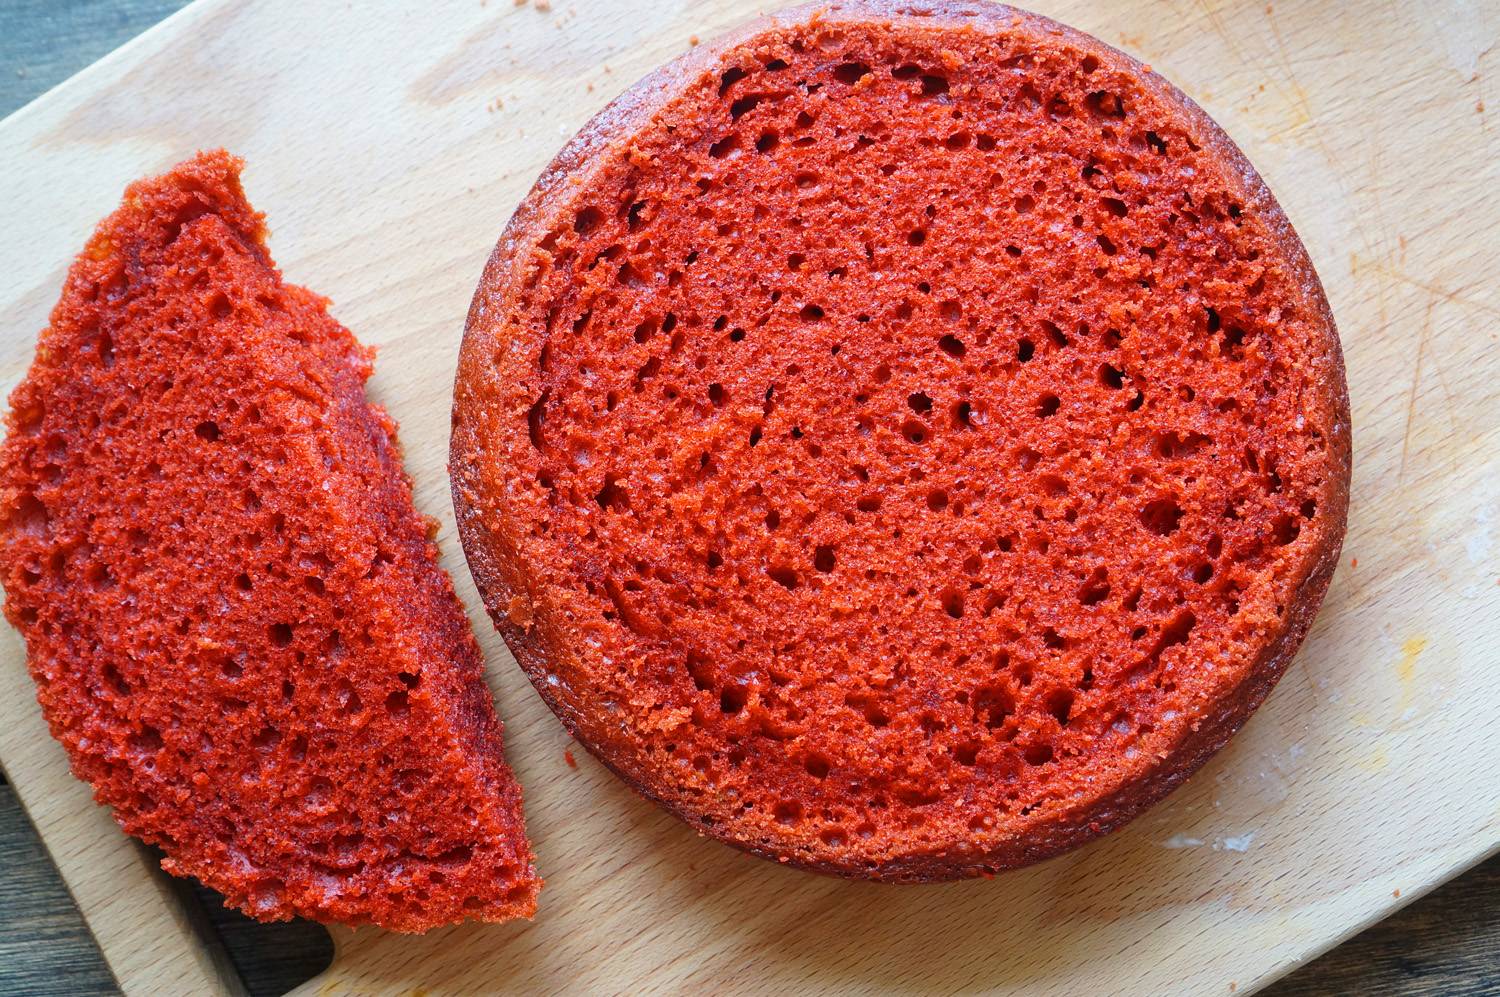
Look how porous the cake is. And how delicious it is. Then you can coat the cake layers with cream and assemble the cake. I'll show you how I did it.
To make a naked cake beautiful, you need to trim the ends (they brown in the oven and become more brown than red). You can simply cut a thin layer with a knife, but I cut with a metal ring - the only way to get all the cakes the same shape and size.
Red Velvet Cake (original recipe - Red Velvet Cake) is a chocolate cake made from red sponge cake, covered with cream cheese cream, in some recipes with cottage cheese cream or mascarpone cream. The red color of the biscuit in the cake is achieved by adding natural or artificial colors to the dough.
The history of red velvet cake originates in South American cuisine, and the name of the cake - Red Velvet Cake - still causes debate among culinary specialists about its origin. Some argue that "red" is related to the brown sugar used in the classic recipe (brown sugar was traditionally called red); although more often the name is associated with a sponge cake with a red hue and velvet structure.
Traditionally, the red hue in the original Red Velvet Cake recipe came from a chemical reaction between cocoa powder, acetic acid, and buttermilk (substituted for kefir in today's recipe)—for this reason, Red Velvet Cake was often referred to as "Devil's food."
The fact is that cocoa contains anthocyanins - substances that give the red tint to some berries and vegetables - and exposure to vinegar and buttermilk revealed this natural dye. However, due to modern alkaline processing of cocoa, anthocyanins are neutralized, so in order to achieve a rich shade, red velvet cake layers must be added with coloring.
But the combination of soda with vinegar and kefir still gives red velvet cream cheese cake its famous airy, light velvety texture. At first glance, the cake recipe may seem somewhat complicated - the dry ingredients will have to be mixed separately from the liquid ones - but the result will be a delicious cake made from vegetable oil.

DoughVed advises. Vegetable oil in the recipe can be replaced with butter - for the amount of products indicated in the cake recipe, 200 g of butter (softened or melted) will be enough.
What can I substitute for food coloring in Red Velvet?
Color the Red Velveteen cake with artificial dyes or replace them with any natural red dyes, for example, beet juice (from the juice of boiled beets). Just keep in mind that not a single natural dye will give the cake such a rich shade as an artificial one. You can go the other way and do without dyes at all - it’s beautiful on its own.
Do I need to soak the cake?
In many recipes, the red velvet cake turns out to be quite dry, so it must be soaked, but today’s recipe is not one of them: the sponge cake turns out moderately moist, so the Red Velvet Cake remains fresh for a long time.
How to decorate a velvet cake?
To decorate the cake, you can use biscuit crumbs (see recipe tips), nuts, confectionery sprinkles, fruits, berries. For a special occasion, such as Valentine's Day, you can bake a red velvet heart-shaped cake; If you are making a cake with mastic or white chocolate glaze, it is better to reduce the amount of cake cream in the recipe.

Red Velvet Cake Recipe
20 minutes to prepare
1 hour to prepare
380 kcal per 100 g
Red Velvet Cake (Red Velvet, Red Velvet) is a delicious chocolate cake with snow-white cream cheese frosting that is easy to make at home.
Is Red Velveteen Cream Cheese Cake delicious? Make a cake at home using this classic American recipe and see for yourself.
For the cakes
- wheat flour – 250 g;
- salt – 0.5 tsp;
- baking soda – 1.5 tsp;
- cocoa – 2 tbsp;
- vegetable oil – 250 ml + for greasing;
- brown sugar – 300 g;
- large chicken egg – 2 pcs.;
- red food coloring – 2 tbsp;
- vanillin – 1 tsp;
- freshly brewed coffee – 100 ml;
- kefir – 250 ml;
- white wine vinegar – 0.5 tbsp.
For cream
- butter – 200 g;
- powdered sugar – 400-450 g;
- cream cheese – 400 g.
Preparation
- Sift flour, salt, baking soda and cocoa into a large bowl.
- Separately, beat the sugar and vegetable oil using a mixer or food processor for several minutes until white.
- Add eggs, one at a time, without stopping beating, as well as coloring and vanilla.
- Mix a third of the sifted flour into the egg-butter mixture.
- In a separate bowl, mix kefir with cooled coffee, add half to the dough, beat.
- Mix half of the remaining flour into the dough and continue beating.
- Combine the remaining kefir with vinegar and beat into the dough.
- Then pour the rest of the flour into the dough and beat thoroughly again.
- Grease three molds with a diameter of 20 cm with oil. We cut out circles of the required diameter from baking paper, line the bottom of the molds with them, and grease them.
- Divide the dough into molds and bake in an oven preheated to 180°C for about 35-40 minutes, check readiness with a toothpick.
- Remove from the oven and cool in the pans for 10 minutes.
- Turn the pans over onto a wire rack (suitable from the oven), remove the cakes and remove the paper. Leave until completely cool.
- To prepare the cream, cut the butter at room temperature into pieces and beat with a mixer for a couple of minutes until white and creamy.
- Sift the powdered sugar into the butter, adding it in three additions and continuing to whisk.
- Add a third of the cream cheese to the butter and beat for a couple of minutes. Make sure that the butter and sugar do not settle on the walls of the cup. We repeat the procedure two more times.
- Let's start assembling the cake. Place the first cake on a plate or cake pan and spread a few spoons of cream over it, not reaching 1-2 cm from the edge. We lay all three cake layers in this way.
- Cover the top and sides of the cake with the remaining cream.
- If the dough sticks to the sides, separate it from the pan using a knife. Or, to make it easier to remove the cakes, you can use springform pans.
- If the cakes have risen too much and do not press down while cooling on a wire rack, cut off the center, chop and use the crumbs for decoration.
- It is important not to “beat” the cream while whipping, otherwise it will turn out too liquid and will be difficult to apply to the cake.
Mysterious... Passionate... A little even demonic... Snow-white on the outside and bright red on the inside... It's all about the cake with the luxurious name Red Velvet. He seems to combine both innocence and passion at the same time. What else would be so perfect as a dessert for Valentine's Day?
Red velvet cake is a classic of American cuisine. Its original name is The Red Velvet Cake (pictured). It looks very impressive thanks to the red sponge cake and stunning white buttercream. The shade of the biscuit can vary - it can be either soft pink or bright red, or dark red or red-brown. The desired shade is achieved by adding food coloring to the crust dough. This dessert has a chocolate flavor, and the airy and soft sponge cake really feels like velvet.
There are many theories about the origin of red velvet cake. Its recipe was known long before it received its charming name. According to one version, red sponge cake was known back in the 19th century. According to another assumption, the idea of making a cake of an unusual red color came to the minds of confectioners during the Great Depression in the USA, when the demand for all food products was reduced.
In this way, bakeries tried to attract the attention of customers and increase their profits. During World War II, bakers used beet juice or boiled grated beets to give the sponge cake the desired shade.

This original cake was very popular in the 40s and 50s of the last century in bakeries and restaurants in Canada and the USA. The recipe for this work of culinary art was considered exclusive and was kept in the strictest confidence.
The Red Velvet cake (pictured) got its name in 1972. This is how it is named in the book by American confectioner James Beard. He shares three red velvet dessert recipes with slightly different ingredients. At that time, food dyes were already quite popular, but it was James Beard who first discovered that the reaction of sour buttermilk and vinegar produced the coloring pigments (anthocyanins) of cocoa powder. This processing of cocoa is called Dutch. The resulting color was more pronounced than the artificial color. This natural coloring became the basis for the name Red Velvet.
This cake also has another name - “Devil's Food”. In the book “A Dictionary of American Food” by John Mariani, it is suggested that it is so named not only because of the peculiar color of the cakes, but because of its mind-blowing taste, which some citizens adhering to Puritan views on life considered sinful.
The recipe was used in the 1989 film Steel Magnolias. After the release of this picture, the popularity of the dessert experienced a rebirth. It can still be found in most foreign confectionery shops and stores.
Red velvet cake has been a favorite dessert for thousands of Americans and Canadians for decades. Nowadays in the USA there are even competitions among confectioners for the brightest red color of the biscuit for it.
Cooking secrets

Preparing this dessert is not so difficult, but some nuances are still worth considering:
- The classic recipe involves using an ingredient such as buttermilk. It is this that gives the dough its tenderness and texture, reminiscent of velvet. Buttermilk has a fairly thick consistency and a rich, buttery flavor, making it ideal for baking cakes. It can be done at home. To do this, mix a tablespoon of apple cider vinegar with a glass of milk and leave for 10-15 minutes. Buttermilk can be replaced with low-fat kefir.
- Freshly baked cakes are very soft, so do not immediately cover them with icing. It will spread and the cakes will become soggy. You need to put the finished biscuit in the refrigerator for several hours or even overnight. The glaze will be easier to apply and will lie in a more even layer.
- The traditional recipe advises using cream cheese for the cream and glaze. Mascarpone cheese is considered ideal - it has a delicate texture and not a very sweet taste. In addition, they have a light beige tint and go well with red biscuit. In addition to cream cheese, you can add whipped cream to the cream, it gives it lightness and completeness.
- The dough for this dessert uses food coloring, but if you are planning to make a red velvet cake for a children's party, it is better to use beet juice or chopped boiled beets to give the cakes the desired shade.
Creating a work of art

So, in order to prepare this cake according to the classic recipe, we will need:
for biscuit:
- 250 grams of flour;
- 3 chicken eggs
- 115 grams of butter;
- 300 grams of sugar;
- 200 grams of buttermilk or low-fat kefir;
- 10 grams of vanilla sugar;
- 2 tablespoons unsweetened cocoa powder;
- 1 teaspoon of soda slaked with vinegar or lemon juice;
- 0.5 teaspoon salt;
- 1.5 teaspoons food coloring.
for cream:
- 10 grams of vanilla sugar;
- 200 grams of butter;
- 250 grams of powdered sugar;
- 450 grams of cream cheese.
Necessary utensils and kitchen equipment: baking dish (diameter approximately 20 cm), sieve, mixer or blender, large dish.
Cooking steps

- Line the pan with baking paper and grease the edges well with butter. Turn on the oven and set the temperature to 180 degrees;
- Sift flour, cocoa, salt through a sieve, mix well;
- The recipe further advises whipping the butter until creamy using a mixer or blender. It will take us 2-3 minutes.
- Carefully add sugar and beat the resulting mass again;
- Continuing to beat at low speed, add the eggs. The recipe advises doing this gradually, not breaking everything up at once.
- Beat a little more. We should get a very fluffy air mass of uniform consistency. This is a guarantee that the cake will be correct.
- Next, the recipe tells us that we need to dissolve the food coloring in buttermilk or kefir;
- Gradually add flour into the fluffy butter mass, and then colored kefir or buttermilk. The recipe recommends doing this in the following sequence: starting to beat at the lowest speed, first add a third of a glass of flour, then half a glass of buttermilk with dye. Then again a third of a glass of flour and the second half of a glass of buttermilk. Lastly, add the remaining flour. Continue beating at lowest speed until smooth and homogeneous.
- Quench the soda with vinegar or lemon juice and mix it into the dough very quickly;
- Beat cream cheese (mascarpone, Philadelphia) and softened butter until smooth and creamy;
- Add vanilla sugar and powdered sugar to the resulting cream and beat again. The recipe says that the cream should be very thick - so that a spoon can stand. We put it in the refrigerator for a couple of hours;
- Let's start baking the cakes for our dish. Pour half of the resulting dough into the baking dish and place in the oven for 25 minutes. After the time has passed, take it out, cool for 10 minutes and remove from the mold. We do the same with the second half of the dough. We also place the finished cakes in the refrigerator for several hours.
- Take the cakes and cream out of the refrigerator and start creating. We place them on a beautiful dish, thickly coat the cakes on all sides, not sparing the cream - the more, the better.
You can decorate the top with whipped cream, chocolate, pieces of fresh strawberries, other fruits or berries, and marzipan hearts. The recipe says that the finished cake must be left in the cold for 9-10 hours.
Red velvet cake (photo) is a gorgeous dessert, ideal for a romantic evening. It has a special energy - it captivates with its defiantly bold contrast of innocence and vice... And its taste is simply delicious! Prepare it for your loved one and he will definitely appreciate your efforts. Bon appetit!
Video recipe for making red velvet cake
"Red Velvet" is one of the most popular and favorite desserts for those with a sweet tooth. Red velvet cake or Red velvet cake can be considered a true American classic. A wonderful sponge cake with a loose, velvety structure, a subtle chocolate aftertaste and an amazingly delicious cheese cream - this is a delicious dessert!
All ingredients for making Red Velvet Cake with Cream Cheese should be at room temperature. Making red velvet dough is so easy that even a child can do it.
So, sift all the dry ingredients into a cup.

Mix the mixture well with a mixer until smooth.

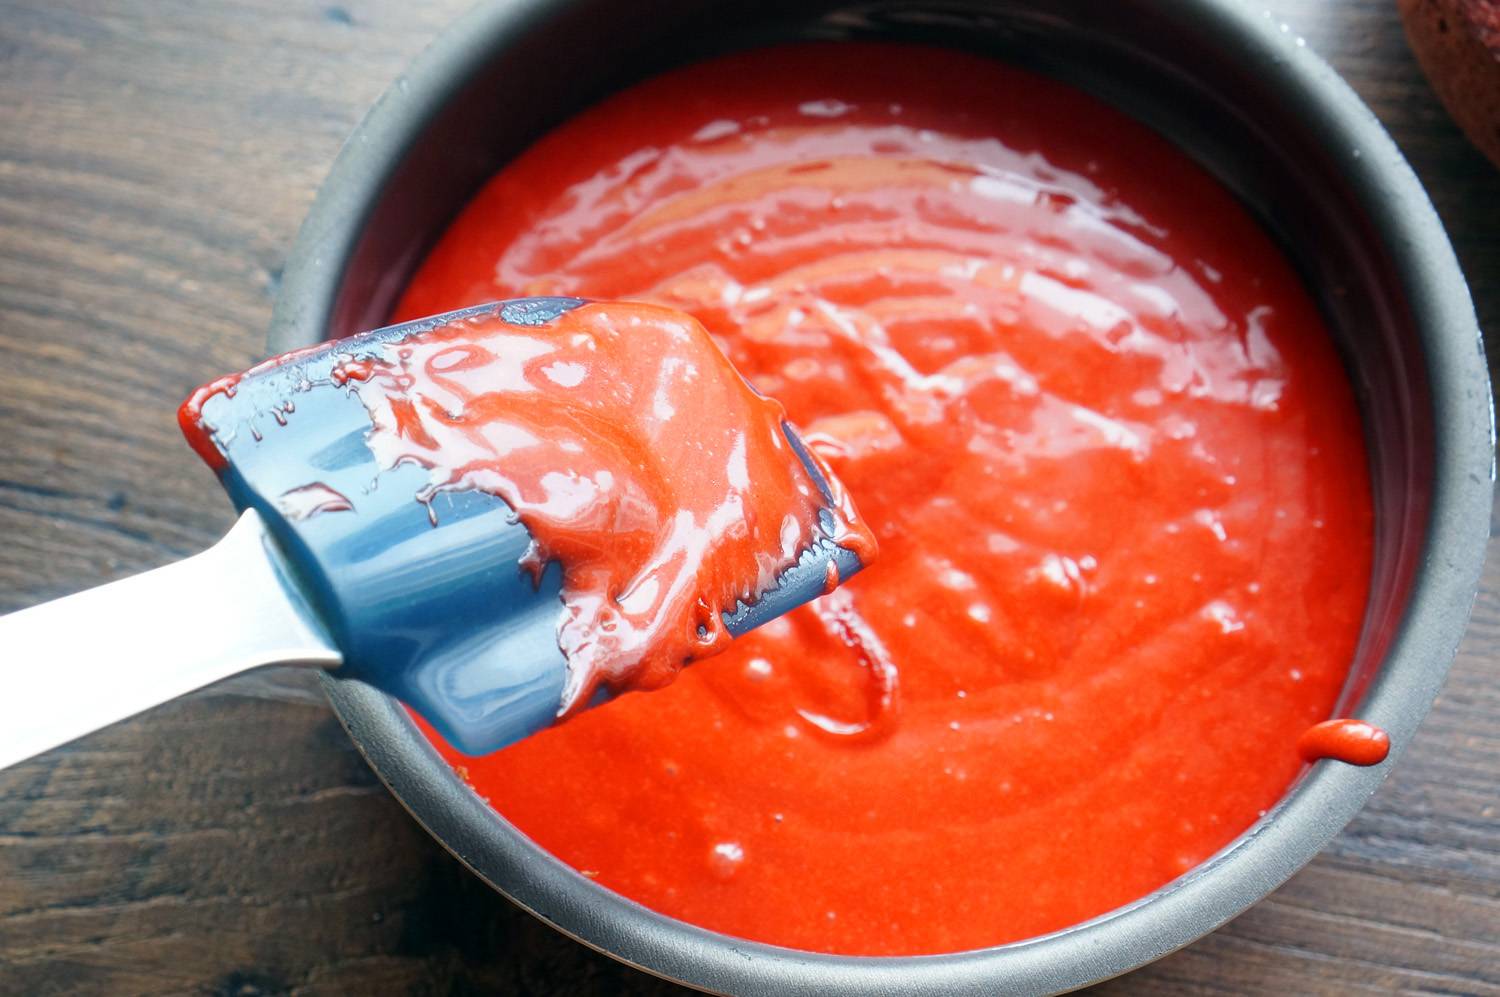
Add food coloring and mix thoroughly to create an intensely bright red color. How much to add depends on the brand and manufacturer of dyes; it is advisable to take water-soluble gel dyes. I added 1.5 tbsp. - follow the instructions for the dye.

You should have a bright red mixture. Leave the dough for 20 minutes so that it reacts with kefir.

Grease the bottom of the springform pan with a thin layer of butter, wipe and cover with cooking paper; DO NOT grease the pan itself with anything. Pour the dough into the mold; it will be thick like sour cream. Bake in a preheated oven at 170-180 degrees for 50-60 minutes, check with a toothpick, it should come out of the biscuit dry.

Let the finished biscuit cool in the pan for a couple of minutes, then remove from the pan onto a wire rack. These biscuits can be prepared in advance, wrapped in cling film and stored in the refrigerator until the desired hour.

The biscuit will probably have a top, a cap. Cut it carefully, break it into pieces, and dry it in the oven.

Beat the biscuit pieces into crumbs in a blender bowl.

Prepare cream cheese for the cake. For this you will need cottage cheese, butter, powdered sugar.

Beat softened butter with powdered sugar until the mixture turns slightly white. Then add cream cheese, stir until smooth.

Divide the biscuit into 2 layers. Place the cream in a piping bag and apply to the cakes.

Level the cake with cream using a spatula or knife.

Pour biscuit crumbs onto the top of the cake and smooth with a brush. Then apply the crumbs to the sides and spread them from bottom to top with a brush.

Decorate the cake at your discretion.

On the eve of the New Year holidays, a New Year's version of cake decoration would also be appropriate.

Red velvet cake with cheese cream is ready for tasting. Enjoy!

Well, a very tasty cake!

I want to show you a version of my summer “Red Velvet”.

