How to do chemical experiments at home. Card file "Chemical experiments for children"
Paper, scissors, heat source.
This experiment always surprises kids, but to make it more interesting for two-year-olds, combine it with creativity. Cut out a spiral from paper, color it together with your child so that it looks like a snake, and then start “revitalizing” it. This is done very simply: place a heat source below, for example, a burning candle, an electric stove (or hob), an iron with the sole up, an incandescent lamp, a heated dry frying pan. Place a coiled snake on a string or wire above the heat source. After a few seconds, it will “come to life”: it will begin to rotate under the influence of warm air.
For children 3 years old:rain in a jar 
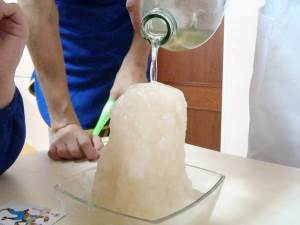
Three-liter jar, hot water, plate, ice.
Using this experience, it is easy to explain to a three-year-old “scientist” the simplest phenomena of nature. Fill the jar about 1/3 full with hot water, preferably hot. Place a plate of ice on the neck of the jar. And then - everything is as in nature - the water evaporates, rises upward in the form of steam, at the top the water cools and a cloud forms, from which real rain comes. In a three-liter jar it will rain for one and a half to two minutes.
For children 4 years old:balls and rings

Alcohol, water, vegetable oil, syringe.
Four-year-old children are already wondering how everything works in nature. Show them a beautiful and exciting experiment about weightlessness. At the preparatory stage, mix alcohol with water; you should not involve your child in this, just explain that this liquid is similar in weight to oil. After all, it is the oil that will be poured into the prepared mixture. You can take any vegetable oil, but pour it very carefully from a syringe. As a result, the oil appears to be in weightlessness and takes its natural shape - the shape of a ball. The child will be surprised to observe a round transparent ball in the water. With a four-year-old child, you can already talk about the force of gravity, which causes liquids to spill and spread, and about weightlessness, because all liquids in space look like balls. As a bonus, show your child one more trick: if you insert a rod into the ball and rotate it quickly, an oil ring will separate from the ball.
For children 5 years old:invisible ink

Milk or lemon juice, brush or feather, hot iron.
At five years old, the child probably already owns a brush. Even if he doesn't know how to write yet, he can draw a secret letter. Then the message will also be encrypted. Modern children did not read the story about Lenin and the inkwell with milk in school, but observing the properties of milk and lemon juice will be no less interesting for them than for their parents in childhood. The experience is very simple. Dip the brush in milk or lemon juice (or better yet, use both liquids, then the quality of the “ink” can be compared) and write something on a piece of paper. Then dry the writing until the paper looks clean and heat the sheet. The most convenient way to develop recordings is with an iron. Onion or apple juice is suitable as ink.
For children 6 years old:rainbow in a glass

Sugar, food coloring, several clear glasses.
The experiment may seem too simple for a six-year-old, but in fact it is worth the painstaking work for a patient “scientist.” The good thing about it is that the young scientist can do most of the manipulations himself. Three tablespoons of water and dyes are poured into four glasses; different colors are poured into different glasses. Then add a spoonful of sugar to the first glass, two spoons to the second, three to the third, and four to the fourth. The fifth glass remains empty. 3 tablespoons of water are poured into glasses placed in order and mixed thoroughly. Then a few drops of one paint are added to each glass and mixed. The fifth glass contains pure water without sugar or dye. Carefully, along the blade of a knife, pour the contents of the “colored” glasses into a glass of clean water as the “sweetness” increases, that is, scientifically, the saturation of the solution. And if you did everything correctly, then there will be a small sweet rainbow in the glass. If you want to talk science, tell your child about the difference in the density of liquids, due to which the layers do not mix.
For children 7 years old:egg in a bottle

A chicken egg, a bottle of pomegranate juice, hot water or paper with matches.
The experiment is practically safe and very simple, but quite effective. The child will be able to carry out most of it himself; the adult only needs to help with hot water or fire.
The first step is to boil the egg and peel it. And then there are two options. The first is to pour hot water into a bottle, put an egg on top, then put the bottle in cold water (ice) or just wait until the water cools down. The second way is to throw burning paper into the bottle and put an egg on top. The result will not be long in coming: as soon as the air or water inside the bottle cools, it will begin to shrink, and before the novice “physicist” has time to blink, the egg will be inside the bottle.
Be careful and do not trust your child to pour hot water or work with fire himself.
For children 8 years old:"Pharaoh's Snake"

Calcium gluconate, dry fuel, matches or lighter.
There are many ways to get “pharaoh snakes”. We will tell you about one that an eight-year-old child can do. The smallest and safest, but quite spectacular “snakes” are obtained from ordinary calcium gluconate tablets; they are sold in pharmacies. To make them turn into snakes, set the pills on fire. The easiest and safest way to do this is to put a few cups of calcium gluconate on a “dry fuel” tablet, which is sold in tourist stores. When burning, the tablets will begin to expand sharply and move like living reptiles due to the release of carbon dioxide, so from a scientific point of view, the experiment can be explained quite simply.
By the way, if “snakes” made from gluconate do not seem very scary to you, try making them from sugar and soda. In this version, a pile of sifted river sand is soaked in alcohol, and sugar and soda are placed in a recess on its top, then the sand is set on fire.
It would not be amiss to remind you that all manipulations with fire are carried out away from flammable objects, strictly under the supervision of an adult and very carefully.
For children 9 years old:non-Newtonian fluid

Starch, water.
This is an amazing experiment, which is easy to do, especially if the scientist is already 9. The research is serious. The goal is to obtain and study a non-Newtonian fluid. This is a substance that, when exposed to a soft influence, behaves like a liquid, and when exposed to a strong influence, exhibits the properties of a solid. In nature, quicksand behaves in a similar way. At home - a mixture of water and starch. In a bowl, combine water with corn or potato starch in a 1:2 ratio and mix well. You will see how the mixture resists when stirred quickly, and stirs when stirred gently. Throw a ball into a bowl with the mixture, lower the toy into it, and then try to pull it out sharply, take the mixture in your hands and let it calmly flow back into the bowl. You yourself can come up with many games with this amazing composition. And this is an excellent opportunity to work out with your child how molecules in different substances are connected to each other.
For children 10 years old:water desalination

Salt, water, plastic film, glass, pebbles, basin.
This study is best suited for those who love travel and adventure books and films. After all, while traveling, a situation may occur when the hero finds himself on the open sea without drinking water. If the traveler is already 10 and learns how to do this trick, he will not be lost. For the experiment, first prepare salted water, that is, simply pour water into a deep basin and salt it “by eye” (the salt should completely dissolve). Now place a glass in our “sea”, so that the edges of the glass are slightly above the surface of the salt water, but lower than the edges of the basin, and put a clean pebble or glass ball in the glass, which will prevent the glass from floating. Cover the basin with cling film or greenhouse film and tie its edges around the basin. It should not be pulled too tightly so that it is possible to make a depression (this depression is also fixed with a stone or a glass ball). It should be just above the glass. Now all that remains is to place the basin in the sun. The water will evaporate, settle on the film and flow down the slope into the glass - it will be ordinary drinking water, all the salt will remain in the basin. The beauty of this experience is that the child can do it completely independently.
For children 11 years old:litmus cabbage

Red cabbage, filter paper, vinegar, lemon, soda, Coca-Cola, ammonia, etc.
Here the child will have the opportunity to get acquainted with real chemical terms. Any parent remembers such a thing as litmus paper from chemistry course, and will be able to explain that this is an indicator - a substance that reacts differently to the level of acidity in other substances. A child can easily make such indicator papers at home and, of course, test them by checking the acidity in various household liquids.
The easiest way to make an indicator is from regular red cabbage. Grate the cabbage and squeeze out the juice, then soak filter paper with it (available at a pharmacy or wine shop). The cabbage indicator is ready. Now cut the pieces of paper smaller and place them in different liquids that you can find at home. All that remains is to remember which color corresponds to which acidity level. In an acidic environment the paper will turn red, in a neutral environment it will turn green, and in an alkaline environment it will turn blue or purple. As a bonus, try making “alien” scrambled eggs by adding red cabbage juice to the egg white before frying. At the same time, you will find out what level of acidity is in a chicken egg.
How to interest a child in learning new substances and properties of various objects and liquids? You can set up an impromptu chemical laboratory at home and conduct simple chemical experiments for children at home.
The transformations will be original and appropriate in honor of some festive event or in the most ordinary conditions to familiarize the child with the properties of different materials. Here are some simple tricks that are easy to do at home.
Chemical experiments using ink
Take a small container of water, preferably one with transparent walls.
Dissolve a drop of ink or ink in it - the water will turn blue.
Add one pre-crushed activated carbon tablet to the solution.
Then shake the container well and you will see that it will gradually become light, without a tint of paint. Coal powder has an absorbent property, and the water returns to its original color.
Trying to create clouds at home
 Take a tall jar and pour some hot water into it (about 3 cm). Prepare ice cubes in the freezer and place them on a flat baking sheet that you place on top of the jar.
The hot air in the jar will cool, forming water vapor. The condensate molecules will begin to gather together in the form of a cloud. This transformation demonstrates the origin of clouds in nature when warm air cools. Why is it raining?
Drops of water on the ground heat up and rise upward. There they cool and meet each other to form clouds. Then the clouds also combine into heavy formations and fall to the ground as precipitation. Watch a video of chemical experiments for children at home.
How your hands feel at different water temperatures
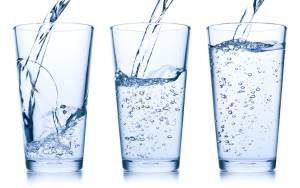
You will need three deep bowls of water - cold, hot and room temperature.
The child should touch cold water with one hand and hot water with the other.
After a couple of minutes, both hands are placed in a vessel with water at room temperature. How does water feel to him? Is there a difference in perception temperature?
Water can be absorbed and stain the plant.
 This beautiful transformation will require a live plant or flower stem.
Place it in a glass of water colored in any bright color (red, blue, yellow).
Gradually you will notice that the plant takes on the same color.
This happens because the stem absorbs water and takes on its color. In the language of chemical phenomena, such a process is usually called osmosis or one-way diffusion.
You can make your own fire extinguisher at home
 Necessary actions:
- Let's take a candle.
- It is necessary to light it and place it in the jar so that it stands straight and the flame does not reach its edges.
- Carefully place a teaspoon of baking powder into the jar.
- Then pour a little vinegar into it.
Next, we look at the transformation - the white baking powder will hiss, forming foam, and the candle will go out. This interaction of two substances produces carbon dioxide. It sinks to the bottom of the jar because it is heavy compared to other atmospheric gases.
The fire does not receive oxygen and goes out. This is the principle behind the fire extinguisher. They all contain carbon dioxide, which extinguishes the flames of fire.
What else you should definitely read:
Oranges have the ability to float on water
 If you put an orange in a bowl of water, it will not sink. Clean it and dip it in water again - you will see it at the bottom. How did this happen?
The orange peel has air bubbles that keep it floating on the water, almost like an air mattress.
Testing eggs for their ability to float on water
 We use jars of water again. Place a couple of tablespoons of salt in one of them and stir until dissolved. Dip an egg into each jar. In salt water it will be on the surface, and in normal water it will sink to the bottom.
Explain to your child that water has a certain density. Salt water tends to hold onto objects. For example, if you were a family at sea, then the child could really feel the properties of sea (salt) water.
An example of a very bad experience, explained in the “safety precautions” section

If the child is younger, it is better to use a ready-made kit for laboratory work.

Or make a similar set yourself. For example, I did the following for my five-year-old son:

There is an ionistor in the yellow heat-shrinkable tube. It charges in 5-10 seconds using a standard USB charger. To the other end, the son attaches a buzzer with a built-in generator, a laser pointer, or any 5 mm LED of his choice. For now this set is enough for him.
About safety precautions
Most of my friends who see this set ask me with concern: “Isn’t it dangerous that the charger is plugged in and children touch it?” Probably, all children are different, but after my son, at the age of two, used a self-tapping screw to remove a plug from an outlet, I realized that it is better to teach a child how to handle plugs and sockets carefully than to install plugs and locks.
I find sockets falling out of boxes, or sockets with damaged covers, much more dangerous, but I experienced the greatest horror when we moved into the same rented apartment. Its owner fixed the line break in one of the rooms in an original way:
My children (2 and 5 years old) are very curious and know very well that there is a plug on one side of the wire and a device on the other, and if this is not the case, then it’s worth figuring it out. Fortunately for my family, I knew this too, and was the first to notice the unusual “thing.” The structure was immediately removed and the wiring redone. NEVER, NEVER allow this to happen in your apartment! This is very dangerous and really can be fatal. Surprisingly, the owner of the apartment did not understand the reason for my indignation.

There are also electronic construction kits, such as “ZNATOK” and its clones. In general, I have a good attitude towards such construction sets, but before purchasing one you need to consider a few points:
- A small child is not yet able to perceive blocks as conductors and abstract the assemblies from them into an electrical circuit, that is, this set is not at all for children.
- Without adult supervision, children immediately discover that they can start the propeller, and that's all they do. I can’t say that this is a bad activity, but this is where learning the set usually ends.
- Under the supervision of a strict adult, the child diligently repeats diagram after diagram from the book without the slightest understanding of what he is doing. Sometimes children try to do something on their own and a short circuit is bound to happen. The battery heats up and runs out, the strict adult is very dissatisfied, the child understands that he “made a mistake” and continues to assemble only according to the diagram.
3. Make a ping pong ball float in the air flow from a hair dryer
Everything is simple here:- Take a ping pong ball and a hair dryer without attachments.
- Turn on the hair dryer and turn it so that the air flow blows vertically upward.
- Place the ball in the flow axis at a distance of about 10 cm from the hair dryer nozzle.
- According to Bernoulli's law, the ball will tend to be in the center of the flow. As a result, it will levitate in the jet.
4. Make a microscope from a drop on glass

The drop has a spherical shape and, in fact, is a collecting lens. It is convenient to study the microcosm using a drop on the edge of a pipette, or a drop on the surface of the glass. The smaller the drop, the smaller objects it allows to observe. If you want to show your child the pixels on a smartphone screen, keep in mind that modern smartphones have high dpi. To see a pixel, the drop must be very small. For these purposes I use a spray bottle. The droplets are so small that they evaporate in a few seconds.
5. Assemble a unipolar motor
Unipolar motor is the simplest type of electric motor that exists. Two options are widely used at home. The first one is with a rotating screw and a magnet, the second one is with a stationary magnet and a rotating frame. Both options are noted in this comment from SilverHorse.6. Make a compass from a magnetized needle on water
This link is a video from my lab colleague. In addition to the compass, the video also very clearly explains how to repeat Oersted's experiment.7. Create your own kaleidoscope

10. Demonstrate how to construct an image with a lens (ordinary magnifying glass)
It is no secret that a converging lens allows you to project actual inverted images onto the screen. I still remember that it was a real discovery for me that when the magnifying glass is correctly placed between the candle and the wall, an inverted image of a candle appears on the wall. Now I no longer light candles for children, but project the screens of their mobile phones onto the wall. This creates a primitive projector. A Fresnel lens can also be used as a collecting lens.

Photo from this site. You can also find instructions and other examples there.
If the child is older, and you are full of strength and energy, then you can even make a real projector with significant aperture and resolution. The search query “DIY projector Fresnel lens” will help you.

You can also add burning with a magnifying glass to this section, thanks to FlameStorm for reminding me. If the child is small, we say that the lens collects light from the sun into one point, if older, we say that we get an image of the sky with clouds and the sun, where the image of the sun burns out. You knew that, didn't you?
11. Assemble the camera obscura. 
This is a very worthwhile experiment with a “wow effect” and a high-quality methodological component. A camera obscura is a dark room on the wall of which, through a hole, an image of the street is projected. In fact, this is the ancestor of cameras!

There are many designs of camera obscura. From the simplest, as in the photo, to more elaborate models with variable focal length, with sets of holes of different diameters and protection from eye exposure. The most diligent parents can assemble a full-fledged film camera with their children, as in this article. Well, if it so happens that the lens on your camera is removed, then it would be a crime not to take several pinhole photographs.

12. Electrify the balloon and stick it to the wall
I think this experiment is well known to everyone. Electrostatics allows you to create a large number of colorful experiments, in addition, many interesting experiments were developed in my “Physics Teaching Methods Laboratory” at my university. I won’t even try to fit anything into this post, but will leave all the material for a separate article.13. Buy an ultraviolet flashlight and turn off the lights in the room

I repeat, almost all bright “poisonous” colors fluoresce. Most children's toys are covered with such paints. It looks very impressive. You can also shine a light into your pencil case, and also draw something with a bright marker.
Instead of a flashlight, you can buy a UV lamp, or borrow a nail lamp from your wife:

Under no circumstances should you conduct experiments with a quartz UV lamp! It emits hard ultraviolet light, which is incredibly harmful to the eyes, unlike an LED flashlight.
14. Buy a plasma lamp and light a fluorescent lamp in the hands of a child

Inside such a lamp there is a Tesla transformer, which emits a powerful alternating electric field, which, in turn, leads to gas discharges in the lamps.
Small children really like the lamp. Under no circumstances should you leave them alone with the device, they may break the lamp or light fixture. Just as tormozedison correctly noted, do not bring electronics that you are not ready to part with to the lamps.
15. Buy soap bubbles

J. B. S. Chardin. Bubble. OK. 1739
This proposal caused a whole wave of discussions in the comments. I agree that you can either buy bubbles or make them yourself. There is a huge variety of fun with soap bubbles, ranging from simple physical experiments (Ya. Perelman, “Entertaining Physics.” Book 1. Chapter 5), to educational demonstrations for students of physics departments (Ya. Geguzin, “Living Crystal” and “Soap Bubbles”) bubbles"). My children themselves figured out that using liquid soap you can get soap bubbles, and now they don’t leave the bathroom for hours.
There are shows with giant bubbles as a separate layer. They don't have much physical content, but children really like them. You can take your child to the show in the summer, or buy a set yourself. If you want to try making bubble liquid with your own hands, I recommend the link provided by Meklon.
16. Experiments with expansion of gases during heating
The purpose of all these experiments is to show that if a gas is heated, the pressure in it increases and it begins to expand. I try not to do these demonstrations until I have explained the basics of MCT to the children.The most famous simple and vivid experience is an egg in a bottle. When I spent a week of entertaining physics at a private school in Montenegro, the children liked this experiment so much that during the break they decided to draw a small instruction themselves:

I admit that the instructions have one error, but I did not interfere in the creative process.
A mystery for interested readers. How to make a simple thermometer from a medical glove and a coffee can, which can be used to determine whether it is warm, cold, or hot.
17. Balloon

Explain to your child how the Hot Air Balloon works and launch a Chinese lantern with it.
18. Helium balloon
Buy a helium balloon and teach your child about Charlier and aeronautics.
19. Reactive force

The simplest thing is to launch a balloon along the thread, as in the photo. On a higher level, this is to make a rocket from a plastic bottle using water and compressed air. Or buy a similar rocket: 
20. Recommendation from jar_ohty
Add to the list “Make a spyglass from two magnifying glasses, holding one in your left hand near your eye, the other in your right.” For me at the age of six, this was such a discovery! Which, moreover, I did myself.
21. Recommendation from alecv
From simple experiments:· On a sunny day, take a mirror and get a sunny spot on the ceiling at home. Then take a basin with 3 centimeters of water poured into it and lower the same mirror with one edge (to get a water prism). The edges of the bunny will turn rainbow.
· Pour water and half a cup of milk into a large container, such as an aquarium. Show the propagation of a light beam from a laser pointer and its reflection.
Conclusion
Before conducting an experiment, I strongly recommend that you understand the physics of the process and think about how best to convey it to your child. In addition, it is worth looking for how others perform these experiments, because the same experiment has a huge number of variations in execution. At the same time, you will find a huge number of new interesting ideas. I invite you to share exciting experiments, useful Internet resources and books in the comments, as well as discuss ready-made kits.
Such a complex but interesting science as chemistry always causes an ambiguous reaction among schoolchildren. The children are interested in experiments that result in the production of substances of bright colors, the release of gases, or precipitation. But only a few of them like to write complex equations of chemical processes.
The importance of entertaining experiences
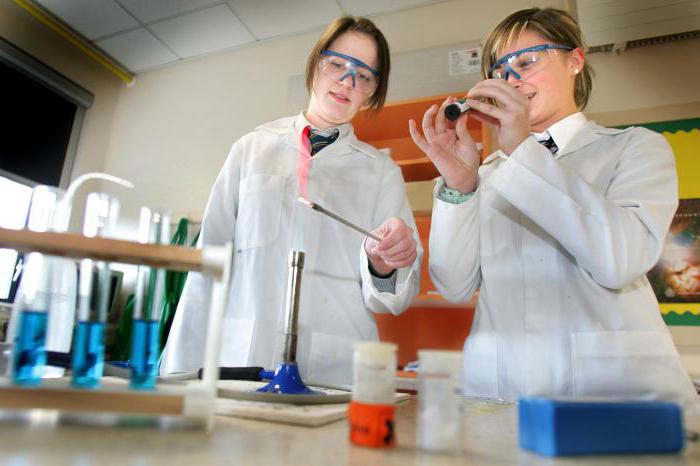
According to modern federal standards, a curriculum subject such as chemistry has been introduced in secondary schools and has not been left without attention.
As part of the study of complex transformations of substances and solving practical problems, the young chemist hones his skills in practice. It is through unusual experiences that a teacher develops an interest in the subject in his students. But in regular lessons, it is difficult for a teacher to find enough free time for non-standard experiments, and there is simply no time to conduct them for children.
To correct this, additional elective and optional courses were invented. By the way, many children who are interested in chemistry in the 8th and 9th grades become doctors, pharmacists, and scientists in the future, because in such classes the young chemist gets the opportunity to independently conduct experiments and draw conclusions from them.

What courses involve fun chemical experiments?
In the old days, chemistry for children was available only from the 8th grade. The children were not offered any special courses or extracurricular chemical activities. In fact, there was simply no work with gifted children in chemistry, which had a negative impact on the attitude of schoolchildren to this discipline. The children were afraid and did not understand complex chemical reactions, and made mistakes in writing ionic equations.
Due to the reform of the modern education system, the situation has changed. Now in educational institutions they are also offered in lower grades. The children are happy to do the tasks that the teacher offers them and learn to draw conclusions.
Elective courses related to chemistry help high school students gain skills in working with laboratory equipment, and those designed for younger students contain bright, demonstrative chemical experiments. For example, children study the properties of milk and become familiar with the substances that are obtained when it sours.

Experiences related to water
Entertaining chemistry is interesting for children when, during the experiment, they see an unusual result: the release of gas, a bright color, an unusual precipitate. A substance such as water is considered ideal for conducting a variety of entertaining chemical experiments for schoolchildren.
For example, chemistry for 7-year-old children can begin with an introduction to its properties. The teacher tells the children that most of our planet is covered with water. The teacher also informs the students that in a watermelon there is more than 90 percent of it, and in a person it is about 65-70%. After telling schoolchildren how important water is for humans, you can offer them some interesting experiments. At the same time, it is worth emphasizing the “magic” of water in order to intrigue schoolchildren.
By the way, in this case, the standard chemistry set for children does not involve any expensive equipment - it is quite possible to limit yourself to affordable devices and materials.
Experience "Ice Needle"
Let's give an example of such a simple and at the same time interesting experiment with water. This is the construction of an ice sculpture - a “needle”. For the experiment you will need:
- water;
- salt;
- ice cubes.
The duration of the experiment is 2 hours, so such an experiment cannot be carried out in a regular lesson. First you need to pour water into an ice tray and place it in the freezer. After 1-2 hours, after the water turns into ice, the entertaining chemistry can continue. For the experiment you will need 40-50 ready-made ice cubes.
First, children should arrange 18 cubes on the table in the form of a square, leaving a free space in the center. Next, after sprinkling them with table salt, they are carefully applied to each other, thus gluing them together.
Gradually all the cubes are connected, and the result is a thick and long “needle” of ice. To make it, just 2 teaspoons of table salt and 50 small pieces of ice are enough.
You can tint the water to make the ice sculptures multi-colored. And as a result of such a simple experience, chemistry for 9-year-old children becomes an understandable and fascinating science. You can experiment by gluing ice cubes in the shape of a pyramid or diamond.
Experiment "Tornado"
This experiment does not require special materials, reagents or tools. The guys can do it in 10-15 minutes. For the experiment, let's stock up:
- plastic transparent bottle with a cap;
- water;
- dishwashing detergent;
- sparkles.
The bottle should be filled 2/3 with plain water. Then add 1-2 drops of dishwashing detergent to it. After 5-10 seconds, pour a couple of pinches of glitter into the bottle. Screw the cap tightly, turn the bottle upside down, holding it by the neck, and twist it clockwise. Then we stop and look at the resulting vortex. Before the “tornado” starts working, you will have to spin the bottle 3-4 times.
Why does a “tornado” appear in an ordinary bottle?
When a child makes circular movements, a whirlwind appears, similar to a tornado. The rotation of water around the center occurs due to the action of centrifugal force. The teacher tells the children about how scary tornadoes are in nature.
Such an experience is absolutely safe, but after it, chemistry for children becomes a truly fabulous science. To make the experiment more vivid, you can use a coloring agent, for example, potassium permanganate (potassium permanganate).

Experiment "Soap Bubbles"
Do you want to tell your children what fun chemistry is? Programs for children do not allow the teacher to pay due attention to experiments in lessons; there is simply no time for this. So, let's do this optionally.
For elementary school students, this experiment will bring a lot of positive emotions, and it can be done in a few minutes. We will need:
- liquid soap;
- jar;
- water;
- thin wire.
In a jar, mix one part liquid soap with six parts water. We bend the end of a small piece of wire into a ring, dip it into the soap mixture, carefully pull it out and blow out of the mold a beautiful soap bubble of our own making.
For this experiment, only wire that does not have a nylon layer is suitable. Otherwise, children will not be able to blow soap bubbles.
To make it more interesting for the children, you can add food coloring to the soap solution. You can arrange soap competitions between schoolchildren, then chemistry for children will become a real holiday. The teacher thus introduces the children to the concept of solutions, solubility and explains the reasons for the appearance of bubbles.

Entertaining experience “Water from plants”
To begin with, the teacher explains how important water is for cells in living organisms. It is with its help that nutrients are transported. The teacher notes that if there is not enough water in the body, all living things die.
For the experiment you will need:
- alcohol lamp;
- test tubes;
- green leaves;
- test tube holder;
- copper sulfate (2);
- beaker.
This experiment will require 1.5-2 hours, but as a result, chemistry for children will be a manifestation of a miracle, a symbol of magic.
Green leaves are placed in a test tube and secured in a holder. In the flame of an alcohol lamp, you need to heat the entire test tube 2-3 times, and then do this only with the part where the green leaves are located.
The glass should be placed so that the gaseous substances released in the test tube fall into it. As soon as heating is completed, add grains of white anhydrous copper sulfate to the drop of liquid obtained inside the glass. Gradually the white color disappears, and the copper sulfate becomes blue or dark blue.
This experience brings children into complete delight, because before their eyes the color of substances changes. At the end of the experiment, the teacher tells the children about such a property as hygroscopicity. It is due to its ability to absorb water vapor (moisture) that white copper sulfate changes its color to blue.
Experiment "Magic Wand"
This experiment is suitable for an introductory lesson in an elective course in chemistry. First you need to make a star-shaped blank and soak it in a solution of phenolphthalein (indicator).
During the experiment itself, the star attached to the “magic wand” is first immersed in an alkali solution (for example, in a solution of sodium hydroxide). Children see how in a matter of seconds its color changes and a bright crimson color appears. Next, the colored form is placed in an acid solution (for the experiment, using a hydrochloric acid solution would be optimal), and the crimson color disappears - the star becomes colorless again.
If the experiment is carried out for children, during the experiment the teacher tells a “chemical tale”. For example, the hero of a fairy tale could be an inquisitive mouse who wanted to find out why there are so many bright flowers in a magical land. For students in grades 8-9, the teacher introduces the concept of “indicator” and notes which indicators can determine the acidic environment, and which substances are needed to determine the alkaline environment of solutions.
"Genie in a Bottle" Experience
This experiment is demonstrated by the teacher himself, using a special fume hood. The experience is based on the specific properties of concentrated nitric acid. Unlike many acids, concentrated nitric acid is capable of chemical interaction with metals located after hydrogen (with the exception of platinum and gold).
You need to pour it into a test tube and add a piece of copper wire there. Under the hood, the test tube is heated, and the children observe the appearance of “red gin” vapors.
For students in grades 8-9, the teacher writes an equation for a chemical reaction and identifies signs of its occurrence (change in color, appearance of gas). This experiment is not suitable for demonstration outside the walls of a school chemistry laboratory. According to safety regulations, it involves the use of vapors of nitrogen oxide (“brown gas”) that pose a danger to children.

Home experiments
In order to whet the interest of schoolchildren in chemistry, you can offer a home experiment. For example, conduct an experiment on growing table salt crystals.
The child must prepare a saturated solution of table salt. Then place a thin twig in it, and as the water evaporates from the solution, crystals of table salt will “grow” on the twig.
The jar of solution should not be shaken or rotated. And when the crystals grow after 2 weeks, the stick must be very carefully removed from the solution and dried. And then, if desired, you can coat the product with colorless varnish.
Conclusion
There is no more interesting subject in the school curriculum than chemistry. But in order for children not to be afraid of this complex science, the teacher must devote sufficient time in his work to entertaining experiences and unusual experiments.
It is the practical skills that are formed during such work that will help stimulate interest in the subject. And in the lower grades, entertaining experiments are considered according to the Federal State Educational Standards as independent project and research activities.
Children are always trying to learn something new every day and they always have a lot of questions. They can explain certain phenomena, or they can clearly show how this or that thing, this or that phenomenon works. In these experiments, children will not only learn something new, but also learn how to create different crafts with which they can then play.
1. Experiments for children: lemon volcano
You will need:
– 2 lemons (for 1 volcano)
- baking soda
– food coloring or watercolor paints
- dishwashing liquid
– wooden stick or spoon (if desired)
- tray.

1. Cut off the bottom of the lemon so it can be placed on a flat surface.
2. On the back side, cut out a piece of lemon as shown in the image.
* You can cut off half a lemon and make an open volcano.

3. Take the second lemon, cut it in half and squeeze the juice into a cup. This will be the reserved lemon juice.
4. Place the first lemon (with the cut out part) on the tray and use a spoon to “remember” the lemon inside to squeeze out some of the juice. It is important that the juice is inside the lemon.
5. Add food coloring or watercolor inside the lemon, but do not stir.

6. Pour dish soap inside the lemon.
7. Add a full spoon of baking soda to the lemon. The reaction will begin. You can use a stick or spoon to stir everything inside the lemon - the volcano will begin to foam.

8. To make the reaction last longer, you can gradually add more soda, dyes, soap and reserve lemon juice.
2. Home experiments for children: electric eels made from chewing worms

You will need:
– 2 glasses
– small capacity
– 4-6 gummy worms
– 3 tablespoons baking soda
– 1/2 spoon of vinegar
– 1 cup of water
– scissors, kitchen or stationery knife.
1. Using scissors or a knife, cut lengthwise (precisely lengthwise - it won't be easy, but be patient) each worm into 4 (or more) pieces.
* The smaller the piece, the better.
*If the scissors do not cut properly, try washing them with soap and water.

2. Mix water and baking soda in a glass.
3. Add pieces of worms to the solution of water and soda and stir.
4. Leave the worms in the solution for 10-15 minutes.
5. Using a fork, transfer the worm pieces to a small plate.
6. Pour half a spoon of vinegar into an empty glass and start putting worms into it one by one.

* The experiment can be repeated if you wash the worms with plain water. After a few attempts, your worms will begin to dissolve, and then you will have to cut a new batch.
3. Experiments and experiments: a rainbow on paper or how light is reflected on a flat surface

You will need:
– bowl of water
– clear nail polish
- small pieces of black paper.
1. Add 1-2 drops of clear nail polish to a bowl of water. Watch how the varnish spreads through the water.
2. Quickly (after 10 seconds) dip a piece of black paper into the bowl. Take it out and let it dry on a paper towel.

3. After the paper has dried (this happens quickly) start turning the paper and look at the rainbow that appears on it.
* To better see a rainbow on paper, look at it under the sun's rays.


4. Experiments at home: rain cloud in a jar

As small drops of water accumulate in a cloud, they become heavier and heavier. Eventually they will reach such a weight that they can no longer remain in the air and will begin to fall to the ground - this is how rain appears.
This phenomenon can be shown to children using simple materials.
You will need:
- shaving foam
- food coloring.
1. Fill the jar with water.
2. Apply shaving foam on top - it will be a cloud.
3. Have your child start dripping food coloring onto the “cloud” until it starts to “rain” - drops of coloring begin to fall to the bottom of the jar.
During the experiment, explain this phenomenon to your child.

You will need:
– warm water
- sunflower oil
– 4 food colors
1. Fill the jar 3/4 full with warm water.

2. Take a bowl and stir 3-4 tablespoons of oil and a few drops of food coloring into it. In this example, 1 drop of each of the 4 dyes was used - red, yellow, blue and green.

3. Using a fork, stir the coloring and oil.

4. Carefully pour the mixture into a jar of warm water.

5. Watch what happens - the food coloring will begin to slowly fall through the oil into the water, after which each drop will begin to disperse and mix with the other drops.
* Food coloring dissolves in water, but not in oil, because... The density of oil is less than water (that’s why it “floats” on water). The dye droplet is heavier than the oil, so it will begin to sink until it reaches the water, where it will begin to disperse and look like a small fireworks display.
6. Interesting experiments: in a circle in which the colors merge
You will need:
– a wheel cut out of paper, painted in rainbow colors
– elastic band or thick thread
– cardboard
- glue stick
- scissors
– skewer or screwdriver (to make holes in the paper wheel).

1. Select and print the two templates you want to use.

2. Take a piece of cardboard and use a glue stick to glue one template to the cardboard.
3. Cut out the glued circle from cardboard.
4. Glue the second template to the back of the cardboard circle.
5. Use a skewer or screwdriver to make two holes in the circle.

6. Thread the thread through the holes and tie the ends into a knot.
Now you can spin your top and watch how the colors merge on the circles.


7. Experiments for children at home: jellyfish in a jar

You will need:
– a small transparent plastic bag
– transparent plastic bottle
- food coloring
- scissors.

1. Place the plastic bag on a flat surface and smooth it out.
2. Cut off the bottom and handles of the bag.
3. Cut the bag lengthwise on the right and left so that you have two sheets of polyethylene. You will need one sheet.
4. Find the center of the plastic sheet and fold it like a ball to make a jellyfish head. Tie a thread in the area of the “neck” of the jellyfish, but not too tightly - you need to leave a small hole through which to pour water into the jellyfish’s head.
5. There is a head, now let's move on to the tentacles. Make cuts in the sheet - from the bottom to the head. You need approximately 8-10 tentacles.
6. Cut each tentacle into 3-4 smaller pieces.

7. Pour some water into the jellyfish's head, leaving room for air so the jellyfish can "float" in the bottle.
8. Fill a bottle with water and put your jellyfish in it.

9. Add a couple drops of blue or green food coloring.
* Close the lid tightly to prevent water from spilling out.
* Let the children turn the bottle over and watch the jellyfish swim in it.
8. Chemical experiments: magic crystals in a glass

You will need:
– glass glass or bowl
– plastic bowl
– 1 cup Epsom salts (magnesium sulfate) – used in bath salts
– 1 cup hot water
- food coloring.
1. Place Epsom salts in a bowl and add hot water. You can add a couple of drops of food coloring to the bowl.
2. Stir the contents of the bowl for 1-2 minutes. Most of the salt granules should dissolve.

3. Pour the solution into a glass or glass and place it in the freezer for 10-15 minutes. Don't worry, the solution is not so hot that the glass will crack.
2