How to cover the cake with cream. How to level a cake with cream at home? Tips and photos
How to make a cake not only tasty, but also smooth and beautiful? How to beautifully sprinkle the sides of a cake with crumbs?
Dear girls!
How to beautifully sprinkle the sides of a cake with crumbs? - The more I look at the photos of cakes posted on the site, the more I want to help and suggest - everything is done simply, and the appearance of your delicious products will be more attractive.
We all baked and bake cake layers. Is it worth repeating what everyone knows that a lot depends on the oven? Therefore, let's leave the oven alone and focus on our capabilities.
The recipe says to “roll out the dough into a cake with such and such a diameter” - we obediently roll it out. What's next? And, I remember, roll the dough onto a rolling pin and transfer it to a baking sheet (this is from my own experience, if anything, maybe there are no such recipes now). Well, we baked the cake - it didn’t turn out very round, and the edge was thicker here, thinner there - was it? It’s okay, then we’ll cover the edges with cream and hide all the flaws, no one will notice anything.
Until recently, I thought so too - well, it turned out delicious, we ate everything instantly, what’s there to talk about? Homemade cake, this is not a pastry shop.
...
This cake is posted here on Povarenka, but... actually, the resentment for this wonderful recipe was the impetus for this post. Unfortunately, simplifying a recipe is not always beneficial. I will give examples based on this honey cake, but this is for example only; any of us has enough everyday experience to understand what we are talking about.
Nowadays there are many convenient kitchen gadgets (not all of them are equally necessary and useful, by the way), but the most important thing is that we need a cake of a beautiful and correct shape 
- a cake ring and a springform pan of the same diameter (straight walls and fastened on the side with a clasp). (There is a one-piece form, where the bottom is pulled out upward, and the corrugated walls expand upward - this will not work).

The cake ring is a metal ring 3 centimeters high, without any special features.

While I didn’t have one, I took a regular baking dish made of aluminum foil of the diameter I needed (the walls should be straight) and simply cut out the bottom from there. (I live in Israel, we have a lot of such forms, they cost pennies).
We took baking paper. Place it on the table (or on a silicone mat with the diameters drawn, they shine through the paper). *I’m not exactly a re-insurer... but I’m used to lubricating this paper, approximately a circle of the size I need, by eye - just oil from the refrigerator, easy to swipe over the paper and that’s it. There is practically no such oil there, it’s more out of habit*
The dough for the crust can be of any consistency - from liquid, which is poured, to one that can only be laid out in pieces - in short, your dough needs to be distributed in any way according to a given shape. There are no problems with the liquid dough - I poured it and that’s it. With thick honey, place it in pieces in a mold, like plasticine, press it with your hands; for thick and viscous honey cakes, lightly moisten the palms of your hands with water. Well, on the table on paper we laid out the dough of the size we need (approximately), try on the shape so that there is no “shortage” at the edges, let there be an excess, this is only a plus, it will be used for topping. Have you tried it on? Fine? We take this sheet and transfer it with the dough to a baking sheet, and only now place the mold on top. If the dough is liquid, then pour it directly into the mold onto paper on a baking sheet.
Honey skins bake very quickly. While the cake is baking, I have time to make 2-3 more pieces on paper for the cake.
The cake is baked - take out the baking sheet, remove the sheet of parchment along with the cake (I put this sheet on the wire rack). If I took a ring from an aluminum foil pan, then you just take it (the pan) with your hand (it’s not at all hot) and put it on the next cake layer, and then put it in the oven. If the metal ring is hot, don’t take it with your bare hand (that’s why I don’t like to take the springform pan itself, it’s tall and it’s easy to get burned).
What we see in the ring and what we don’t see without the ring - in the ring the dough rises like a sponge cake, the cake is 1.5-2 cm high, honestly, and has a perfect round shape. 
We take a knife and cut out a biscuit along the edge of the metal ring (I don’t lubricate the ring with anything), it turns out to be a very beautiful cut, nice to look at. We put the trimmings from the outside into a bowl (it will be used for topping).
Without a ring - an ordinary pancake: in the center it is thicker, along the edges the thickness of the cake tends to zero, the circumference is far from ideal. Alas.
We baked some cakes. We made a cream (it’s better to make it according to the original recipe, on Povarenka the recipe is reduced). There should be a lot of cream. Plums - there should also be a lot of plums, cut into long thin strips, the 24 cm cake will be practically covered with them (plum - 2 layers, don’t forget). Nuts - I understand what they found and bought at the nearest supermarket, but after the second cake I went to the market to look for delicious nuts and found them. You are making a cake for yourself, for your family.
The last cake layer, which is usually used for topping - by this point it should already be clear to you that this particular cake layer (if there is still a need for it) may not be a round cake layer at all. Lay out the dough as much as there is left and bake it a little harder (but not to the point of “a little burnt” and do not overdry)
We begin to assemble the cake in a springform pan. You need to put a little cream on the bottom of the mold, just a drop, the bottom cake will stick and will not slide (this will be important when moving the cake somewhere). The cakes fit tightly into the mold. In general, if you think of weighing the empty container in which you will make the cream, then after preparing the cream, you can weigh this dish again and understand approximately how much cream you need for 1 layer (in this case: 4 layers + cream on the side surface, We count it as another cake layer, so we roughly divided the resulting weight into 5 parts). For the first cake, you take this cream from the bowl and understand how much it is, how many spoons, then you don’t have to weigh anything.
Now it’s important not to skimp, we calculated 200 g (this is an option for cream with vanilla pudding), which means you lay out these 200, spread them over the entire surface, don’t skimp on the edges! If some edge of the cake almost reaches the edge (it happens - we are all people, we are all human), then add more cream to this problem area. The cream will not escape from the mold anywhere, but it will even out absolutely everything. Second cake and so on. Upper layer. Again the right amount of cream.
In general, you get a lot of cream (which is just a plus) - it’s not too much, but just the right amount. For example, I prefer to put a layer of cream on the cake, plums or nuts on top of this cream, and add cream on top again, and then the next cake layer. For what? - then the cake will be well soaked from below too, I like it better this way. It would be naive to expect that the side of the dry cake that lies entirely on prunes will be as soft and rich as the one covered with cream.
Now put the cake in the refrigerator, even for a few minutes (5 is enough), just during this time we have time to make the topping - mix the crumbs and the remaining nuts. You can crumble the whole thing with a rolling pin (the nuts or cake scraps should be in a bag), but if you have a blender, it will turn out much faster, more beautiful and easier. If you don’t have a blender, it’s okay, a rolling pin will help out. The main difference, as I noticed, is that if you crush the nuts with a rolling pin, they may become a little oily. By the way, first I sort out the nuts (I learned from my own bitter experience, when I came across a piece of shell in a nut pie in a cafe, it was very unpleasant), rinse it, then dry it in the oven - it’s all quick.
After a few minutes, take the cake out of the refrigerator.
* Now another lyrical digression. You want to make the cake big, don’t you? Well, so that there is something to eat. I understand, I myself had a large family until the children grew up and moved away. But if you do everything correctly, your cake will be about 10 cm high. The sprinkles on the sides will also add at least 1.5 cm in diameter. And the question immediately arises: do you have a dish of this diameter? Not just a large dish, but so that the flat surface is no smaller than the diameter you need? (that is, the sides of the dish or plate no longer count) And if you decide to bring this beauty to work, then HOW will you transport this giant??? Therefore, I do not recommend increasing the diameter, the shape is 24 cm - and the cake will be huge, believe me *
We have reached the exciting stage - the sprinkles (are you tired of reading? The materiel will soon be over). I’ll say right away that this turned out to be the most time-consuming operation! Therefore, after the first such cake, I began to look for a solution. 
I found it and will tell you now. If you have such a spatula for cream - good, if not - then a silicone spatula will also work, but it has a long handle, which is not so convenient for me personally.

We take the cake out of the refrigerator. Carefully unfasten the form and remove it (the bottom remains, of course). Now attention. At this point, you can decide whether you need to bother icing the sides of your cake at all - I mean it. The cake looks very beautiful and presentable. The sides are perfectly even and smooth, all layers are visible, the thickness of the cream layer between the layers is not less than 1 cm. Often the edges of homemade cakes turn out dry, but not in this case, when you assemble the cake in a mold and do not skimp on laying out the entire required portion of cream . If you decide that this is enough, you can decorate the top of the cake, carefully return the mold to its place and return the cake to the refrigerator until X hour.
Who decided to go for a walk like this, shall we continue?
Remove your prepared cake plate. (I bought a cardboard plate with a diameter of 28 cm from a disposable tableware store.) Place a sheet of parchment paper on the dish and now place your cake here, carefully holding it under the bottom (it is metal). Look what happened - the parchment near the cake rose like frills. Now, when you sprinkle the cake, nothing will spill on the table, everything remains in this paper.
Now, to make it convenient, take a large-diameter pan, turn it upside down, and place your dish with the cake on it (to make it convenient to rotate the cake and not have to bend over too much).
Scoop up crumbs with a cream spatula, bring the spatula to the cake and gently press the crumbs from bottom to top. Some of it crumbles, of course - nothing, again with a cream spatula you grab a portion of delicious crumbs at the base of the cake and again easily press them to the side surface of the cake. We turned the plate a little - and everything started again. On the table itself you don’t have any crumbs, and no waste at all (and remember earlier, the whole kitchen is covered in crumbs... how much to clean up later... brrrr)
Now you can easily transport the cake, move it with this paper, remove it at the very last moment.
The cake turns out very big. I remembered the math and recalculated everything into a smaller shape (it's easy).
Questions (I get asked all the time at work, so I answer right away):
What to do if there is no such form or ring for the cake?
It will just spread on the sheet, that’s for sure. Better take a foil pan and cut out the bottom. If this is not possible, then you can get out of it this way: find a frying pan slightly larger than the required diameter (pay attention to the handle of the frying pan! So that it doesn’t cause excruciating pain when you try to squeeze the frying pan into the oven, you get the idea). Be sure to place a sheet of baking paper on the frying pan (cut out a circle). Once baked, cut out a circle of the required diameter from the baked cake (on a plate), just hold the knife perpendicularly so that the edges of the cake are even, then everything will turn out like in the picture above. But this is a completely extreme case.
If you don’t have a springform pan, try to find a paper one; they are usually straight in height and without any frills. If you didn’t find such a shape in the store - don’t panic, take the same baking paper, fold it in several layers, make yourself a ribbon - about 10 cm high, and now make yourself this shape, fasten a couple of sheets together so that the ribbon is long enough . (Circumference length for a shape with a diameter of 24 cm: P = Pi * d = 24 Pi ≈ 75.398208 cm, do not forget to add a couple of centimeters to your pattern so that the edge meets the edge and secure this edge. Girls, I didn’t find the symbol of the Greek letter Pi = 3.14 - geometry, 6th grade).
Why does honey cake with cream stay in the refrigerator for a day?- and it gets soaked. The analogy is literally how we defrost food from the freezer by placing it on the refrigerator shelf overnight, and in the morning it can be used. So is the cake - the cakes are soaked, but, figuratively speaking, they do not stick together into one pancake, which will happen if you just leave the cake on the table overnight (although the taste probably shouldn’t suffer).
The taste becomes completely different - bright, rich honey, sweet and sour.
(well, they also put it in the refrigerator for safety reasons, so that it doesn’t spoil if it’s hot, and the cake will retain its shape when cut. But I’m talking about honey cake with sour cream; other cakes may have their own nuances.)
There is another problem - if you have a child who is able to open the refrigerator on his own, then the inquisitive child will not be satisfied with just contemplating the cake in the refrigerator and will definitely find the opportunity to break off a piece to try. I place the cake in a low, large-diameter pan (28 cm) with a lid (with parchment paper the cake is very easy to move, don’t skimp on the paper) so that the cake doesn’t accidentally absorb any foreign odors, and so that the whole refrigerator doesn’t smell like honey.
About myself - I’m never a cook or a pastry chef by profession, but I’m an active user in the kitchen. Therefore, the advice is more likely to come from the “News from the Fields” section.
At first I decided to post a cake recipe with photographs of each stage described here, but I thought that now I would bake it only on January 1, and by that time you will all have baked your own delicious cakes, so I decided to make a post now so that someone has time take advice. I’m new to the site, and of course I don’t know a lot - someone tell me if it’s possible to post a recipe similar to what’s on the site, but more detailed, or something, and with your own comments.
Thank you.
I wrote everything for a long time, but everything is done very quickly and without hassle
I wish everyone beautiful and delicious cakes!
Julia
P.S.
If I unknowingly violated the rules of the site, then do not attack in chorus and do not hit with ladle, I will correct myself! It’s better to tell me where to read these rules and how to post links correctly.
Photos are not mine, taken from the Internet. because here I am only telling you what these kitchen tools are and how to use them.
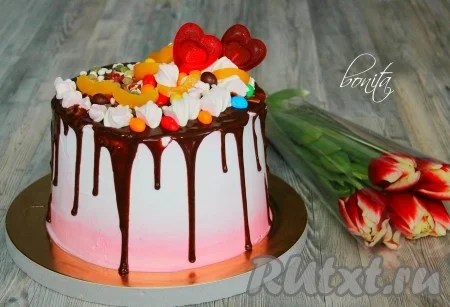
Today I will show you how to decorate a birthday cake at home by lining it with cream. To do this you will need knowledge and manual dexterity. Mastic cakes have long faded into the background, and “naked” cakes or cakes covered with cream and decorated with fruits and chocolate are becoming fashionable. You can use any cream for decoration: protein meringue, cream cheese or, like me, vegetable cream. Vegetable cream is great for decoration, it does not flow and whips perfectly. I don’t recommend using regular cream, as it will run and you won’t be able to level the cake perfectly.
Ingredients
For alignment we need:
cake;
vegetable cream;
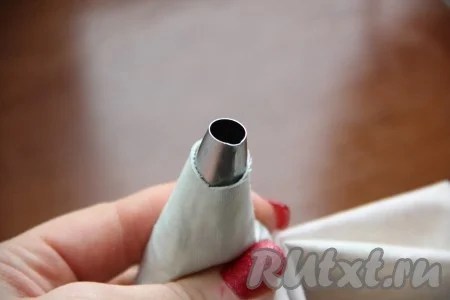
pastry bag with nozzle;
spatula for leveling.
Cooking steps
Prepare the cake the night before decorating to allow it to set and soak.
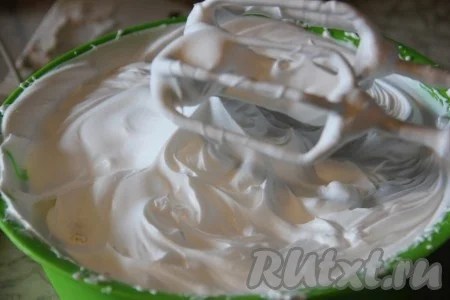
Beat the cream for decoration. The cream can be any kind, I use vegetable confectionery cream, it does not flow and holds its shape perfectly. Whisk the cream as directed on the package.
 Fill the pastry bag with cream.
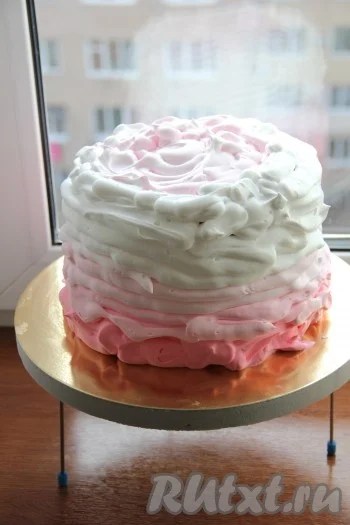
 Now let's level the cake. Starting from the very bottom, squeeze out the cream in a circle. If you want to make a color transition on the cake, you need to tint the cream with food coloring in the desired color.

Gradually cover the entire cake with thick layers of cream, approximately 1-2 centimeters thick.
 Use a special spatula to level the sides of the cake. We hold the spatula in place and twist the stand with the cake as much as possible until the sides of the cream are even.
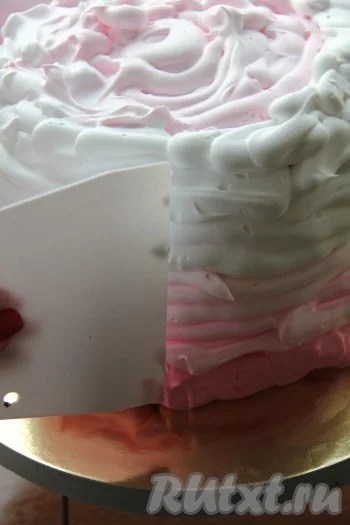 These are the smooth sides we should get.
 Next, decorate the cake as you wish: with fruits, sweets or chocolate drips. Thanks to the cream leveling, the cake turns out amazingly beautiful.
 Bon appetit!
It happens that a cake made according to one recipe may look sloppy to one housewife, but to another - like a real work of art. When crumbs from the cakes get under the icing, it goes on unevenly, and all the imperfections immediately become noticeable. Cream for leveling the cake under glaze and mastic will help to properly form the cakes, make the dessert neat, appetizing, pleasing to the eye with grace and beauty.
What is cake leveling cream?
The opinion that mastic itself, lying on the cakes in a thick layer, can hide the shortcomings of the cakes, is erroneous. All flaws will appear as soon as it covers the product, so it is very important to first level the relief and edge of the cake, preparing it for decoration. A thick layer of buttercream - base, leveling - ideally glues the crumbs on the surface. By then applying a second layer, you can ensure that the glaze or mastic lays down in a perfectly even, uniform layer, maintaining its beautiful appearance for at least 72 hours.
What cream is best for leveling a cake?
The ideal coating is a cake mastic cream that can level the cakes and prevent the mastic from leaking or deforming. The light texture of sour cream and yogurt masses does not cope with this task. Dense, pliable mixtures (custard, butter) perfectly level the dessert and give the cakes a smooth, neat appearance. For leveling desserts, creams made from condensed milk with butter and ganache are suitable for glazing; for mastic – ganache, custard, and “Cheese”.
It is important to remember that the curd and cream mixture must be cooled before use, so it will become more manageable, but the butter mixture, on the contrary, needs to be warmed at room temperature for several hours. Cake leveling steps:
- Level the cakes, cutting off any unevenness on the sides, layer and assemble the cake, place in the refrigerator for 20 minutes so that the dessert “sets.”
- The first layer of cream is the thickest, applied, carefully distributed, leveled with a pastry spatula (plastic, metal), spatula (special spatula) or a knife with a blunt end. It is convenient to distribute the curd mass over the surface using a pastry bag with a round nozzle.
- Let the dessert cool for 15-20 minutes.
- If necessary, apply another layer of leveling compound, thinner. Cool again.
- If you run a slightly heated spatula over the surface before laying out the mastic, the coating will melt slightly and become even more homogeneous.
Curd with cream
- Time: 20 minutes.
- Number of servings: 6 persons.
- Calorie content of the dish: 302 kcal/100 grams.
- Purpose: dessert.
- Cuisine: European.
- Difficulty: easy.
Easy-to-prepare curd-butter cream is suitable for leveling, layering, decorating cakes, and filling cupcakes. Lightweight, delicate, it holds its shape perfectly. The original taste will give the baked goods a zest and uniqueness. The recipe allows you to change the amount of sugar depending on the preferences of the cook (if the biscuits turn out to be too sweet, you can use less powder).
Ingredients:
- curd cheese – 540 g;
- cream 30% – 120 g;
- powdered sugar – 70 g.
Cooking method:
- Beat the well-chilled cream with a whisk for about 5 minutes, or with a mixer for 2 minutes.
- As soon as the cream increases slightly in volume, becomes foamy and a little thick, begin to add the curd cheese in parts, continuing to beat the mass.
- Gradually add powdered sugar, beat until smooth.
- Before use, place the cream in the refrigerator for half an hour.
- When leveling the cake, the first layer of curd and butter cream is applied in a thick layer, leveled with a pastry spatula, and cooled for 10 minutes in the refrigerator. The next layers can be made less abundant, but before each new stage of leveling, the cake is cooled for 10 minutes.

Cheese cream made from kefir and fermented baked milk
- Time: 1 day and 20 minutes.
- Number of servings: 4 persons.
- Calorie content of the dish: 121 kcal/100 grams.
- Purpose: dessert.
- Cuisine: Russian.
- Difficulty: easy.
Homemade cheese cream is suitable for filling and lining cakes. It turns out thick, dense, and due to the fat content of the ingredients, it holds its shape well. It will not be possible to prepare such a creamy mass quickly: according to the technology, it needs to be kept for at least a day. Some housewives leave the cream under the press, but this is not necessary. A huge advantage of this dessert is its low calorie content and lack of sugar in the composition.
Ingredients:
- kefir 3.2% – 440 ml;
- Ryazhenka 4% – 480 ml;
- sour cream 25% – 430 ml;
- lemon juice – 2 tbsp.
Cooking method:
- In a deep bowl, mix the products: sour cream, fermented baked milk, kefir. Mix the mixture thoroughly with a tablespoon.
- Add pre-squeezed lemon juice to fermented milk products and stir.
- Line the strainer with a cloth (muslin cloth is ideal) and place it on a stable bowl or large saucepan.
- Pour the resulting mixture into a strainer, leave for 24 hours in a cool place, excess liquid will drain during this time.
- After a day, place the mixture in a convenient container and mix thoroughly.
- This cream can be used to level the cake after cooling it for an hour in the refrigerator.

Chocolate cheese cream
- Time: half an hour.
- Number of servings: 2 persons.
- Calorie content of the dish: 327 kcal/100 grams.
- Purpose: dessert.
- Cuisine: European.
- Difficulty: easy.
Chocolate cheese cream is ideal for leveling cakes, decorating cakes or cupcakes, or layering sponge cakes. In terms of cost, it is cheaper than ganache, incredibly tasty, and can be stored for up to 3 days. To prepare the composition correctly, you need to take into account some nuances: do not allow the cheese to freeze during storage (otherwise the cream will end up with grains) and do not overbeat the cream until it turns into butter.
Ingredients:
- creamy curd cheese – 600 g;
- cream 33% – 1 l;
- powdered sugar – 200 g;
- chocolate – 360 g.
Cooking method:
- Beat 450 ml of well-chilled cream in a bowl with a mixer for 7 minutes, starting at medium speed, gradually increasing it.
- Add powder to the whipped cream until fluffy and beat with a mixer for a minute.
- Combine the curd cheese with the sweet cream mixture and mix with a mixer.
- Heat the remaining 550 ml of cream in a saucepan until it boils over medium heat, pour into a bowl with pre-crumbed chocolate, let stand, stir until smooth. The chocolate should dissolve completely.
- Combine the two resulting mixtures (cream cheese and chocolate), mix with a mixer at medium speed until smooth.
- Let the cream cool for an hour in the refrigerator.

Custard
- Time: half an hour.
- Number of servings: 6 persons.
- Calorie content of the dish: 165 kcal/100 grams.
- Purpose: dessert.
- Cuisine: European.
- Difficulty: medium.
Custard recipes differ in consistency and composition: some confectioners use butter and condensed milk. The proposed option is suitable for leveling, layering cakes, filling eclairs, tubes, biscuits, and pastries. Its neutral taste can be enriched by adding vanilla, cinnamon, berry or mint liqueur, or rum. It is important to use fat milk (not lower than 3.2%).
Ingredients:
- milk – 400 ml;
- sugar – 160 g;
- eggs – 3 pcs.;
- vanilla sugar – 5 g;
- starch – 10 g.
Cooking method:
- Beat the eggs into a small saucepan or saucepan, add granulated sugar, vanilla sugar, and mash with a fork.
- Add starch to the egg-sugar mixture and mix thoroughly with a silicone spatula. Pour in the milk and stir with a whisk until smooth.
- Heat the saucepan with the mixture over low heat, stirring continuously, without bringing to a boil. As soon as the cream begins to thicken, keep it on the heat for a minute, continuing to stir, then turn off the stove.
- It is advisable to cool the cream for at least an hour in the refrigerator before use.

From oil-based condensed milk
- Time: 20 minutes.
- Number of servings: 6 persons.
- Calorie content of the dish: 460 kcal/100 grams.
- Purpose: dessert.
- Cuisine: Russian.
- Difficulty: easy.
Thanks to its thick consistency, butter cream with condensed milk holds its shape perfectly and is suitable for leveling cakes, greasing biscuits, wafer rolls, and shortbread. If desired, when mixing the ingredients, housewives add coconut flakes, vanillin, cognac, and liqueur. Cookies add extra density to the composition, so you don’t have to add it if you’re making it with boiled condensed milk.
Ingredients:
- butter – 180 g;
- condensed milk – 1 can;
- classic cookies “Jubilee” – 5 pcs.
Cooking method:
- Let the butter sit at room temperature for an hour or two.
- Beat the butter cut into small pieces with a blender or mixer at high speed until the mass becomes homogeneous and fluffy. This takes approximately 5 minutes.
- Add condensed milk to the butter and beat with a mixer for 3-4 minutes.
- After crushing the shortbread cookies, add them to the mixture and mix well with a mixer until the crumbs are evenly distributed.
- Leveling the cake under the mastic is done with a knife with a blunt end or a pastry spatula, after which the cake is sent to the refrigerator. After half an hour you can start decorating.

- Time: 15 minutes.
- Number of servings: 2 persons.
- Calorie content of the dish: 171 kcal/100 grams.
- Purpose: dessert.
- Cuisine: French.
- Difficulty: medium.
Unpretentious French meringue is suitable for decorating cakes, muffins, lining cakes, and as an independent dish. Prepare it quickly, but it is necessary to do this immediately before use to avoid settling. Egg whites at room temperature will whip easier, the mass will come out fluffier and more tender.. If you turn the container with whipped meringue over and it loses its shape, you should continue to beat the mixture.
Ingredients:
- chicken egg white – 1 pc.;
- sugar – 55 g.
Cooking method:
- Carefully separate the white from the yolk and pour sugar or powdered sugar into a separate container.
- The mixing bowl and mixer whisks must be fat-free and perfectly dry.
- Beat the whites with a mixer, starting at low speed, gradually bringing it to maximum.
- After 6 minutes of beating the egg whites, without stopping the mixer or reducing its speed, begin to gradually pour in the sugar. Beat for ten minutes.
- When the sugar has dissolved and the meringue becomes thick and glossy, turn off the mixer. The cream is ready.

Swiss
- Time: 20 minutes.
- Number of servings: 4 persons.
- Purpose: dessert.
- Cuisine: European.
- Difficulty: medium.
Combining the properties of butter and protein creams, Swiss meringue lays down perfectly, hardens quickly, and is ideal for leveling under mastic, for filling eclairs, cupcakes, and tartlets. Thanks to the technology of heating in a water bath, desserts with such filling can be safely offered to children. If desired, vanillin is added to the composition or colored with food coloring.
Ingredients:
- chicken egg white – 100 g;
- sugar – 200 g.
Cooking method:
- Place the mixed whites with sugar in a water bath, bring to 60°, stirring constantly.
- After removing the mixture from the heat, beat with a mixer at maximum speed for 7-8 minutes. During this time, the cream will cool down and take on a dense, shiny shape.
- The meringue is ready to use.

Italian
- Time: half an hour.
- Number of servings: 4 persons.
- Calorie content of the dish: 176 kcal/100 grams.
- Purpose: dessert.
- Cuisine: European.
- Difficulty: medium.
Italian airy meringue is denser than French or Swiss. It holds its shape perfectly, is very stable, dense, and does not require subsequent heat treatment. This cream is suitable for layering, leveling, decorating cakes, for macarons or meringues. Lime juice, vanilla, coffee or orange zest will perfectly complement the flavor of the meringue.
Ingredients:
- chicken egg white – 100 g (2-3 pcs.);
- sugar – 200 g;
- salt – 1 pinch;
- water – 50 g.
Cooking method:
- Mix water and sugar in a saucepan and place over medium heat. When the water boils, reduce the heat and cook for 6 minutes, so the syrup reaches the desired temperature (115-118°).
- By the time the syrup boils, it is necessary to separate the whites from the yolks, mix them with a pinch of salt and begin to beat until a light foam forms.
- In a thin stream, begin pouring hot (118°) syrup into the whites whipped to soft peaks. It is important to avoid contact with the stream of syrup on the mixer beaters, which are running at minimum speed at this moment.
- Having completely combined the syrup with the whites, increase the mixer speed to maximum, beat for another 7 minutes until stiff peaks form, until the meringue has cooled to 35 degrees.

Milk chocolate and cream ganache
- Time: half an hour.
- Number of servings: 8 persons.
- Calorie content of the dish: 476 kcal/100 grams.
- Purpose: dessert.
- Cuisine: French.
- Difficulty: easy.
Many pastry chefs who work with fondant prefer to line the cake with dark, white or milk chocolate ganache. This cream is suitable as a candy filling, fondant, glaze. Butter gives the ganache additional gloss and plasticity, although some people cook without it. An important condition for the manufacturing technology is to prevent the cream from boiling.
Ingredients:
- milk chocolate – 300 g;
- butter – 50 g;
- cream 33% fat – 200 ml.
Cooking method:
- After pouring the cream into a saucepan, place it over medium heat and wait until it boils: as soon as small bubbles begin to appear on the surface, turn off the cream.
- Grind the chocolate bars by hand or using a food processor.
- Pour hot cream over the chocolate pieces and stir the mixture with a whisk until a homogeneous consistency is obtained. Cover the pan with cling film and let cool for 7-8 minutes.
- Place butter, pre-warmed at room temperature, cut into small pieces, into the warm chocolate-cream mixture. Stir vigorously until it is completely melted and the mixture becomes smooth.
- Leave the ganache in the refrigerator for several hours (preferably overnight), take it out an hour before decorating the cake, and leave it to warm up at room temperature.

Colored ganache
- Time: 10 hours and 20 minutes.
- Number of servings: 10 persons.
- Calorie content of the dish: 469 kcal/100 grams.
- Purpose: dessert.
- Cuisine: French.
- Difficulty: easy.
Multi-colored ganache is prepared on the basis of white chocolate, the quality of which is very important for the final result (poor quality chocolate may not dissolve at all). It is recommended to take fat-soluble food coloring of the desired color, but water-soluble or gel are not suitable. Berry purees should also not be used: there is a chance that the cream will curdle.
Ingredients:
- white chocolate – 600 g;
- heavy cream – 300 ml;
- food coloring – 1-3 g.
Cooking method:
- Pour the cream into a saucepan and heat over low heat, stirring until it begins to boil. You can't boil it!
- After removing the cream from the heat, add white chocolate, previously crushed by hand or with a knife. Stir the mixture with a silicone spatula until smooth.
- Heat food coloring based on vegetable fat in a glass container in the microwave at maximum power for 10-15 seconds. When it acquires a runny consistency, pour into the warm ganache and stir thoroughly until the color is even.
- Cover the finished mass with cling film and place in the refrigerator overnight.
- Before use, leave at room temperature for 2-3 hours.

Video
Quite often, housewives who love to surprise their family with delicious dishes have a question about what kind of cream to use for cake icing.
Below I present a selection of creams that will help you bake a delicious cake and trim it to apply a beautiful icing.
You can also find a recipe for one type of glaze on the pages of my culinary blog.
For the sponge cake
Components:
200 gr. sl. oils; 3 pcs. chickens yolks; 4-6 tbsp. condensed milk; 60 gr. chocolate; 1 tsp water.
Cooking algorithm:
- I'm whipping chickens. yolks, condensed milk and water.
- I put the mixture in a water bath to form a thick mass, like condensed milk. I stir constantly.
- I bring in chocolate. I remove the mixture from the water bath and wait for the chocolate to completely melt.
- I let the mixture cool, stir it thoroughly and add slurry. oil. I coat the cake.
That's all, now you know how to level the cake under the icing. Agree that the recipe for the cream is not at all complicated, and it includes a simple set of ingredients. Leveling the cake with it is as easy as shelling pears.
Charlotte under glaze
Very interesting creamy composition. There is no flour in it. It is ideal for making layers on cakes and cupcakes.
Ingredients: 4 tbsp. Sahara; 200 gr. sl. oils; 2 pcs. chickens eggs; 6 tbsp. milk.
Cooking algorithm:
- Mix the milk with sugar and put it on the fire until the mixture boils.
- I beat the chicken in a bowl. eggs using a whisk. I add a hot mixture of sugar and milk to the mixture. I stir and let the mixture cool.
- I beat the words. oil to form a white mass.
- While whipping the sl. butter, it is worth introducing the egg-milk mass. I beat until you get a fluffy custard that is worth applying to the cake.
Butter cream composition with powdered sugar
I like the recipe because it is universal. It can be used as a decoration on a cake or for layering sponge desserts.
It holds its shape perfectly and is suitable for smoothing the surface of a cake, creating flowers and roses from butter.
But know that he is afraid of a warm environment, and therefore you should be especially careful with this.
Ingredients: 4 tbsp. sah. powders; 100 gr. sl. oils
Cooking algorithm:
- I take the word oil. It must be of high quality. I beat the mass. Due to prolonged whipping, the cream will acquire a creamy taste, and not just buttery. Sl. The butter should be softened before doing this. A creamy consistency is easily achieved if... leave the oil warm.
- Whipping sl. oil, add sugar. powder After this, you can beat the mixture at medium speed for about 15 minutes. So it should become fluffy and airy.
- I put the cream in the refrigerator for a short time so that the mass cools down, then it can be used to cover the cake.
Butter cream composition with condensed milk
It may be noted that this recipe has one more variation. I remember how in Soviet times they prepared it for cakes. This is a cream with sl. butter and condensed milk.
Components: 200 gr. sl. butter, half a can of condensed milk.
Cooking algorithm:
- I soften the words. oil.
- I mix it with condensed milk.
- I beat it with a mixer, it can be used for cake.
Custard cream from England
This type goes well with puff pastry and choux pastry. You can also make it for filling profiteroles and tartlets.
To be honest, I can’t even imagine eclairs or the classic Napoleon cake without it.
Components:
0.5 l of milk; 4 things. chickens eggs (only yolks are needed); 50 gr. flour; 150 gr. Sahara; 1 page vanilla.
Cooking algorithm:
- Sugar from chickens Grind the yolks together. I add flour. I cut the vanilla into halves. Using a sharp knife, I scrape out the seeds and place them in the milk mixture.
- Bring vanilla and milk to a boil. I reduce the heat to low. I add eggs and flour to the mixture. I stir again.
- It needs to become thick. I let the mixture cool.
- There should be no crust on top of the cream, to prevent this from happening, my advice to you: cover the surface of the cake with food. film until serving.
Swiss meringue with butter
Confectioners around the world love this cream. It's amazing on cakes and used to fill Swiss Buttercream Meringue into cupcakes.
Keeps its shape perfectly and looks beautiful. Keeps in the cold for up to 3 days.
Components: 250 gr. sl. oils; 90 gr. Sahara; 3 pcs. chickens proteins; vanillin; salt.
Cooking algorithm:
- I place sugar and chickens in a bowl. proteins. I heat the mixture in a water bath, stirring constantly with a whisk. When the sugar crystals dissolve, remove from the water bath.
- Add salt and beat with a mixer until the mixture becomes thick in consistency. Checking its density is very simple - you need to turn the container with chickens over. eggs, if they remain in place, then everything is done correctly.
- I take softened sl. oil, but an exceptionally high quality product. Otherwise, it will not be tasty and suitable for the composition of the cake. I beat it to form a white fluffy mass.
- Whipped sl. oil 1 tsp. I add it to the protein mixture. I beat, it is important that the butter disperses completely into the protein composition. You can add food to the mixture. dyes and vanillin to make the cake even more interesting and tastier.
Patissiere
Custard can be used to glaze cakes. The cream differs from the above in that it does not contain flour.
It includes starch. It is for this reason that the cream mass will not curdle over the fire.
Components:
2 pcs. chickens eggs; 100 gr. Sahara; 50 gr. sl. oils; 0.5 l of milk; 1 page of vanilla and 30 gr. starch.
Cooking algorithm:
- I cut the vanilla into 2 parts and take out the seeds. I put them in milk. I heat the mixture and let it stand for 30 minutes.
- I mix chickens. eggs, sugar and starch. I enter half a tbsp. milk and stir. I add the rest of the milk and bring the mixture to a boil, stirring constantly. Bubbles will appear from the bottom - that means you are doing everything correctly. You need to boil the mixture for 2 minutes and remove from heat.
- I enter the next word. oil, cool so that the cream becomes thick in composition.
The result is a very tasty cream, you can work with it to cover baked goods - this activity will bring great pleasure to the pastry chef.
Muslin
Patissier is used as the basis for the cream, only this time you will need to add cream. Excellent for Napoleon or Millefeuille cakes, it goes amazingly with icing.
Components:
2 pcs. chickens eggs; 100 gr. Sahara; 50 gr. sl. oils; 0.5 l of milk; 1 page of vanilla and 30 gr. starch; 100 ml cream.
Cooking algorithm:
- I cut the vanilla into two parts and take out the seeds. I put it in milk. I heat the mixture and let it sit for half an hour.
- I mix chickens. eggs, sugar and starch. I enter half a tbsp. milk and stir. I add the rest of the milk and bring the mixture to a boil, stirring constantly. I add cream. Bubbles will appear from the bottom. You need to boil the mixture for 2 minutes, then remove from heat.
- I enter the next word. oil, let it cool until it becomes thick in composition. I use it.
Cream cheese
Cream cheese is one of the most popular. Confectioners like it because it is prepared as simply as possible.
It has a slightly salty taste, because it contains salt. cheese. It holds its shape perfectly and complements cakes, pastries, and cupcakes.
Components: 500 gr. sl. cheese; 100 gr. cream (take about 33% fat content); 70 gr. sah. powders.
Components:
- I whip the cream. Do not overbeat the mixture, as the butter will separate; you need to work with the cream in a cold state. Also my advice to you is to chill the whisk, the bowl.
- I introduce sah. powder, cheese and beat the mass again.
- I put it in the refrigerator for 1 hour.
Cream cheese with butter under glaze
The recipe is no less popular than the previous one. Every cook likes it because it is ideal for decorating and leveling cakes.
The cheese should only be used cold. the oil should be at room temperature.
Components: 180 gr. sl. oils (fat content 82%); 500 gr. TV or the next cheese; 150 gr. sah. powders.
Cooking algorithm:
- Cheese etc. I mix the butter together.
- I beat the mass and add sugar. powder and mix again with a mixer.
- I put it in the refrigerator for the cream to reach.
Meringue from Italy with glaze
The densest consistency of meringue is prepared for cakes, tartlets and other pastries.
Ingredients: 40 ml water; salt; 120 gr. Sahara; 2 pcs. chickens egg whites.
Cooking algorithm:
- I'm whipping chickens. proteins and salt together.
- I make syrup based on sugar and water. Mix sugar and water together, bring to a boil and boil for 5 minutes.
- I make syrup, beat chickens. proteins and salt. Just don't overcook the mass. The syrup should be introduced in a thin stream. Pour into the mixture and beat for a minute.
- You can use cream to decorate and smooth the cake.
Chocolate ganache for glaze
It is one of the best under glaze. You can use ganache to decorate cakes and make cupcakes. Various desserts with it turn out incredibly tasty.
Ingredients: a bar of delicious chocolate; cream (fat content 33%).
The amount of ingredients will depend on the type of chocolate you have chosen. You may need 2 parts dark bar and 1 part cream.
If the ambient temperature is high, it is worth taking 2.5 or 3 pieces of tiles.
If you are making milk ganache with a chocolate bar containing 30% cocoa, you need to add 3 parts of the bar and 1 part of cream. In summer, take about 3.5-4 parts of chocolate.
But for white cream, you should take 3 parts of a white chocolate bar and 1 part of cream, in the summer increase to 3.5-4 parts.
It should be noted that a white chocolate bar will be the softest, and therefore I would not recommend making ganache in the summer.
During the hot season, many confectioners refuse to work with this cream at all. It is better for beginners in cooking to work with milk or dark ganache.
Cooking algorithm:
- I chop a chocolate bar with a sharp knife.
- Pour the cream into a bowl with a deep container and thick walls. Keep it on medium heat until there are no bubbles in the mixture. I take it off the fire.
- Let it cool and add chocolate, tilting the pan in different directions. The cream should cover the chocolate, leaving the mixture for a couple of minutes. It is important that the tiles melt.
- Mix the chocolate mixture with the cream using a spatula. You can also do this with a whisk, but be sure to take it dry.
- I put the pan with the cream on low heat and stir until the chocolate melts completely. I pour it into a container, cover it with food. film and leave for 1 night so that the mass with cream stabilizes. It is better to warm it up a little in the microwave before you start working with the cream.
- The mixture for the glaze should be left on the kitchen table overnight; you should not leave it in the cold, but in the morning you should cover the cake.
My video recipe
Girls, I’ll show you how I level the cake) I assembled the cake on working plywood and put it in the refrigerator for 2 hours. I smeared it a little on the sides and just a little on top. Leave a little cream for the crumbs. I pulled it out of the refrigerator, put the base on top on which we will serve the cake (if the napkin is lacy, then I put the parchment first, then the napkin, then the base) and sharply wrapped the cake. Here we have it upside down now)
Now, even if the cake is even on the sides (sometimes this happens)) I still cut it off a little, just a little. This biscuit grew and a mushroom formed, so I had to cut off more.

When we cut it, it became even, it seems that you can immediately apply cream under the mastic, but since it’s summer, it’s hot, and the fillings are different, so that it definitely doesn’t drip, I make crumbs, even if some kind of cream comes up in the heat leak (after all, not everyone follows the rules for using the cake before cutting), then the crumb absorbs everything into itself.

I add another 1-2 tbsp to these scraps. any cream (if there is no cream, then add vegetable cream) beat with a mixer. I don’t know how to describe the consistency, but so that it is more like a cream than a dense mass, it should be easy to apply with a knife, like a cream and not reach for the knife. We coat the cake with this crumb first on the sides, applying the crumb just above the top line of the cake, then on top

Smooth out those edges that have formed on the sides onto the plane of the cake

We leveled it and put it in the refrigerator for an hour, or, if we are in a hurry (as I was today) for 5-10 minutes in the freezer (but no more!!) During this time we make the cream for the mastic - I forgot to take a photo, I’ll just tell you in words. I beat about 200 grams of butter into a fluffy mass with 1-2 tbsp. sah. powders. I take 200 grams. cup, pour half of the white chocolate glaze and half of the black, put it in a micro to defrost, once it has melted, mix well so that everything melts completely, when it has cooled a little, pour it into the butter with powder and beat it well at high speed - the cream brightens. Take out the cake and coat the sides first in a circle. While I was smearing, where I started to smear the cream had already become hard, and now it’s easy to level it, I level it from bottom to top so that a small edge is also formed at the top, then I smear the top and smooth the edges from the sides onto the top of the cake

I don’t put it in the refrigerator anymore. Since while I’m rolling out the mastic, the cake will return to normal temperature and won’t sweat. I cover it with mastic... And here I ask you not to laugh... well, I don’t have a special pastry iron, but I do have an iron from a building materials store, but with a special pad - it’s soft and glides very well over the mastic.

Using an iron, I level first the top, then the barrel, the iron must be held perpendicular to the substrate, and so I level the top-sides, top-sides, until it is even, and in no case should I smooth the sides (well, except when you need a streamlined or semicircular shape )

Well, that's all... Maybe I'm doing something wrong, but everyone should find something for themselves that suits them... this leveling suited me, the cake does not sag or flow.